Anna Claire Thompson
Connect with me:
  • Home
  • Blog
  • Gallery
    • Exhibition
    • Commission
    • Contemporary
  • About
  • Contact

Beer Jewellery? Yep.

14/11/2016

Comments

 
Picture
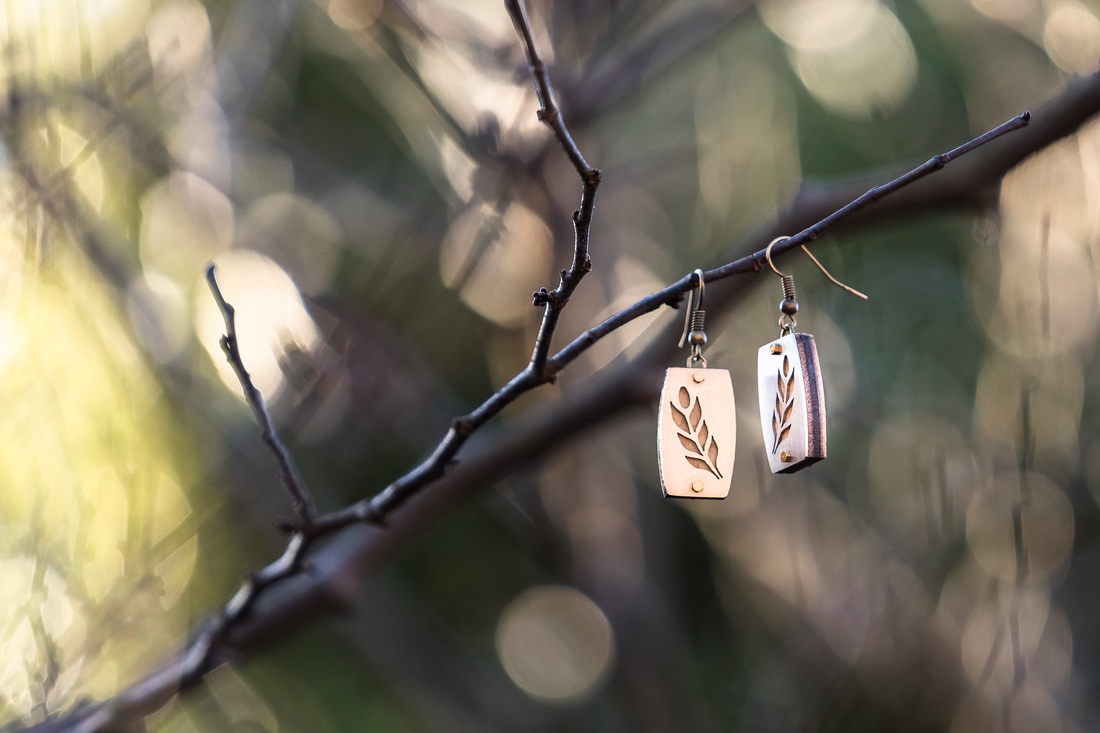
Barley earrings. Photo buy Suzannah Maree Photography.
Amanda and Steve of Invercargill Brewery are staunch supporters of the Arts in the South. They knew the struggle of being a small, startup business, and they know the joy of bringing something unique and genuine to an appreciative audience. 
Invercargill Brewery sells their craft brews, some selected international imports, glassware and  merchandise in the Cellar Door shop attached to the on-site brewery on Leet st in Invercargill.  They 
approached me a couple of years ago about creating a line of brewery-themed jewellery to sell to their many international and out-of-town visitors. Thus began a long process with a huge learning curve for my arts practice. 
Picture
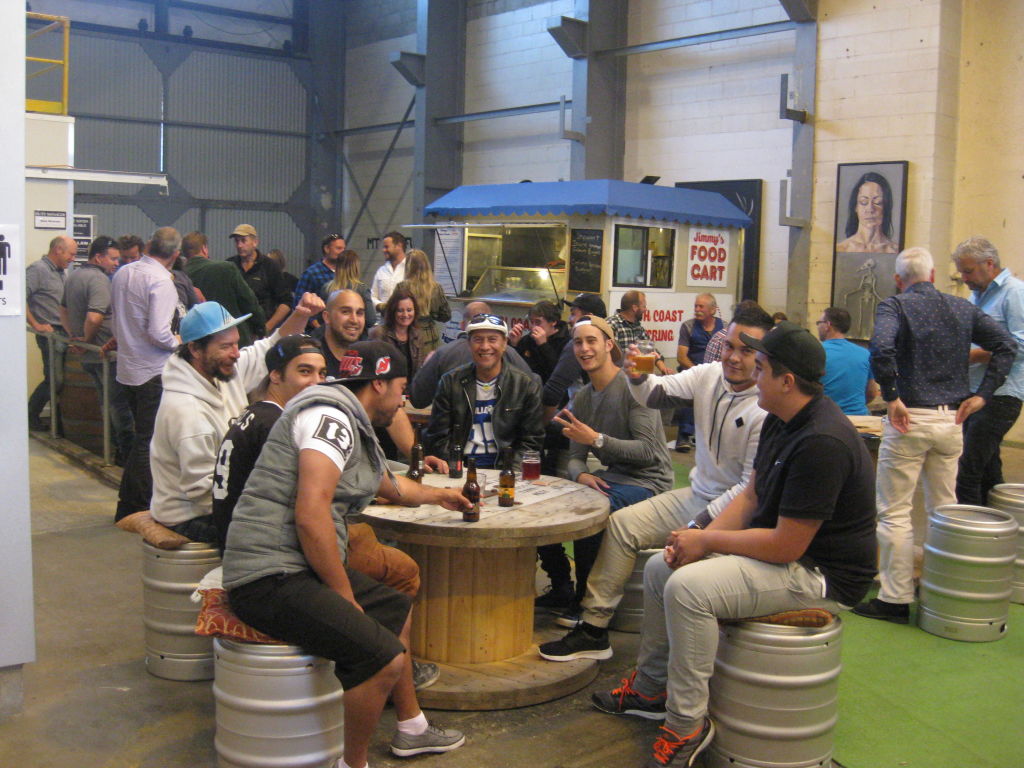
Invercargill Brewery's "Meet the Brewer" event. They host frequent arts and cultural events at the Brewery, including local bands and visual artists.
I had already been thinking of making a line of jewellery that partially outsourced the manufacturing. When I hand make every part of a piece of jewellery, it inevitably takes a long time and needs to be priced accordingly. This was a good opportunity for me to explore having some elements of my work made by some other manufacturing process, and thus make my jewellery more accessible. 
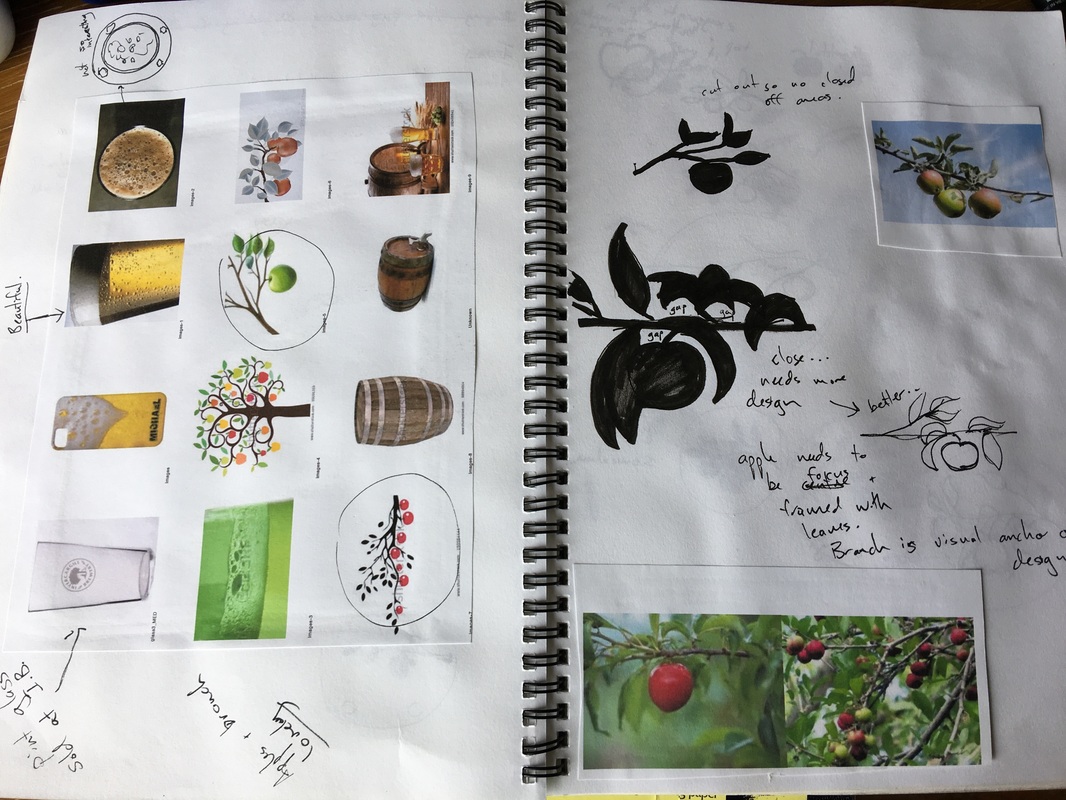
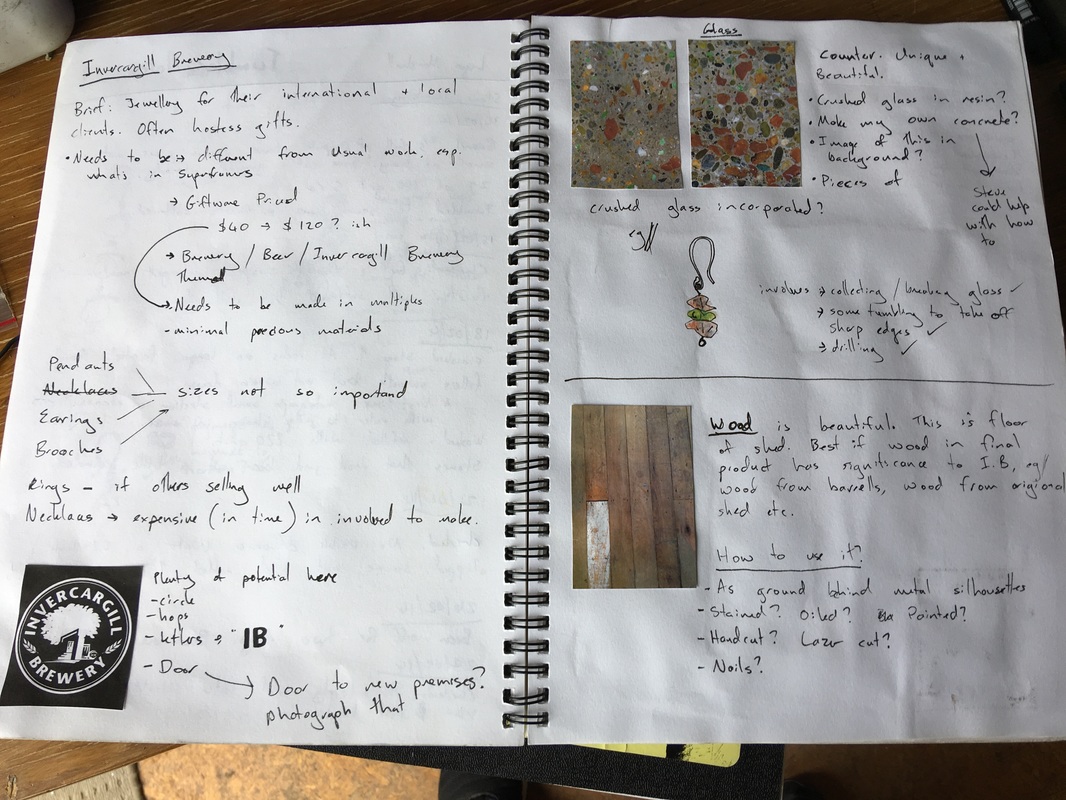
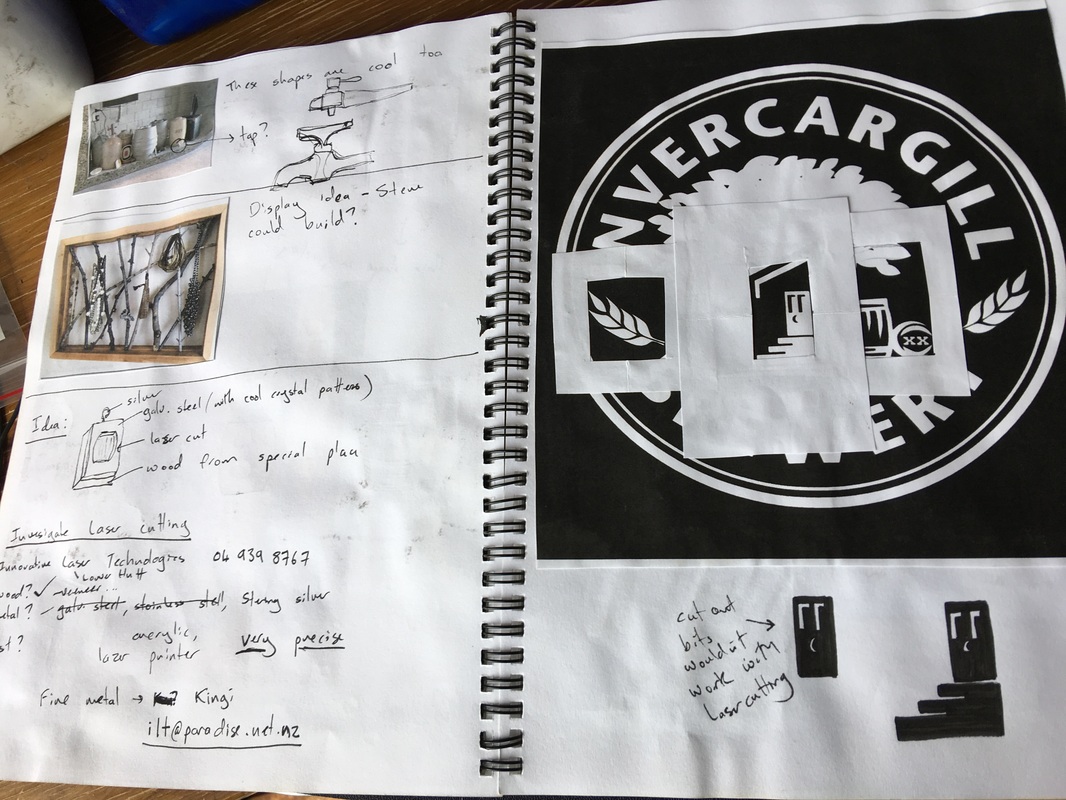
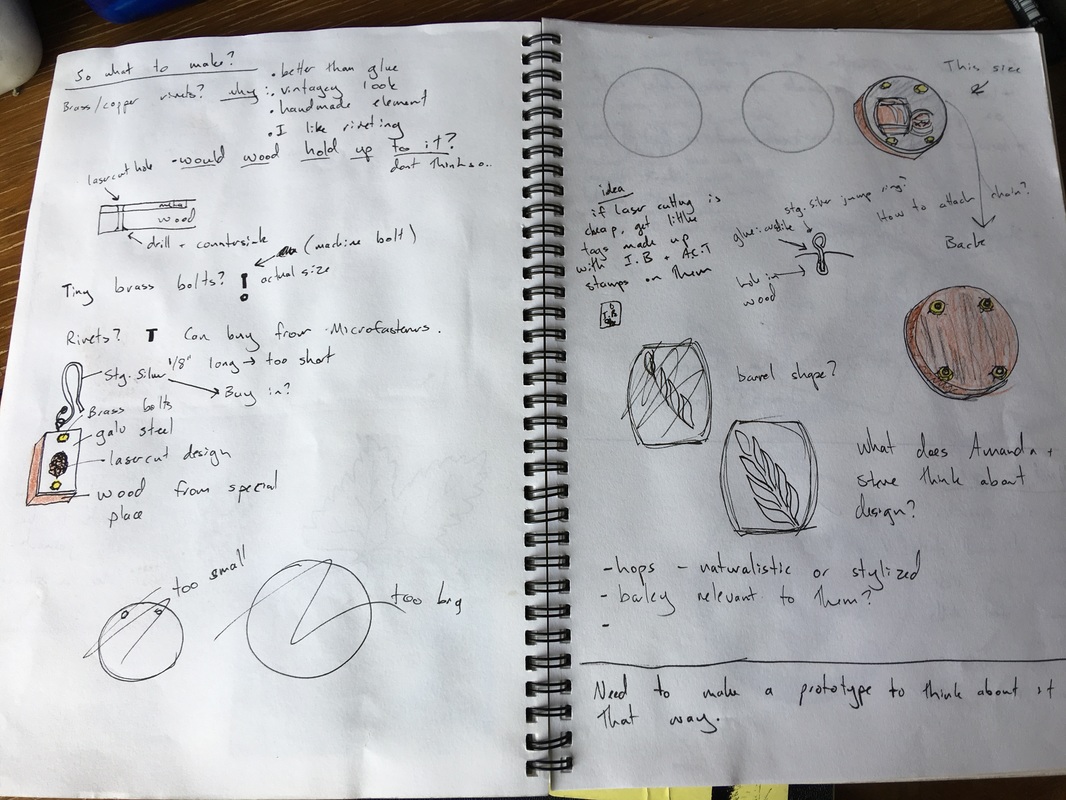
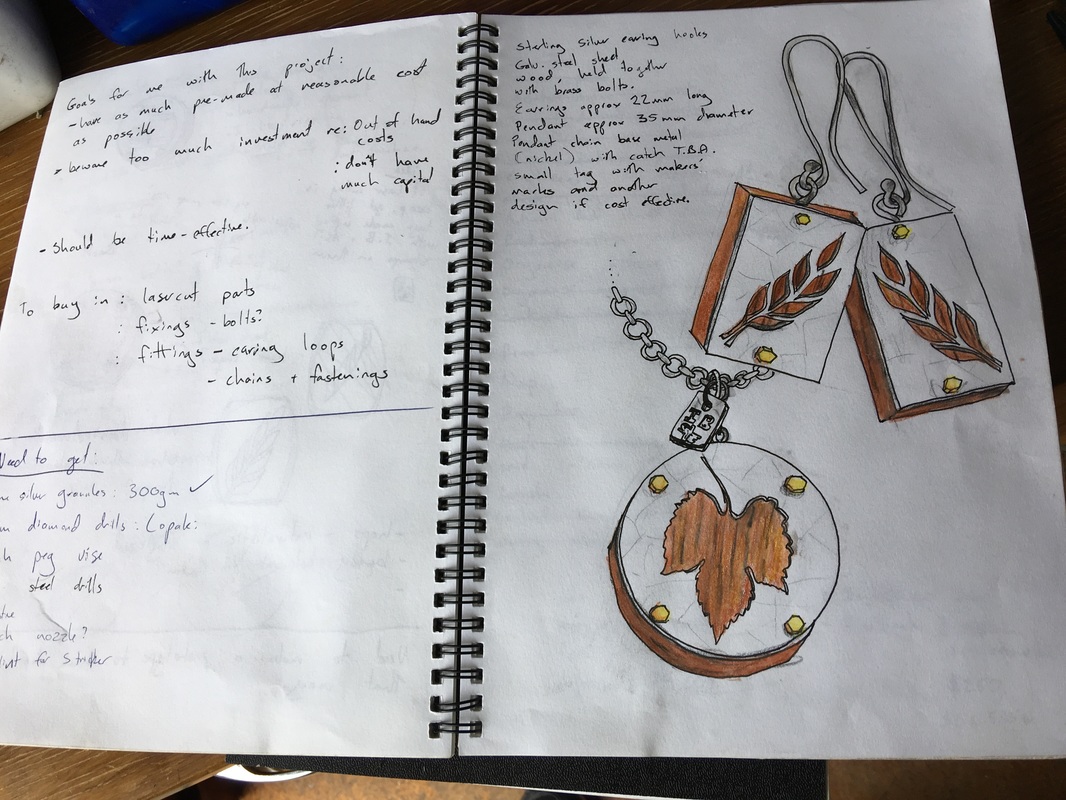
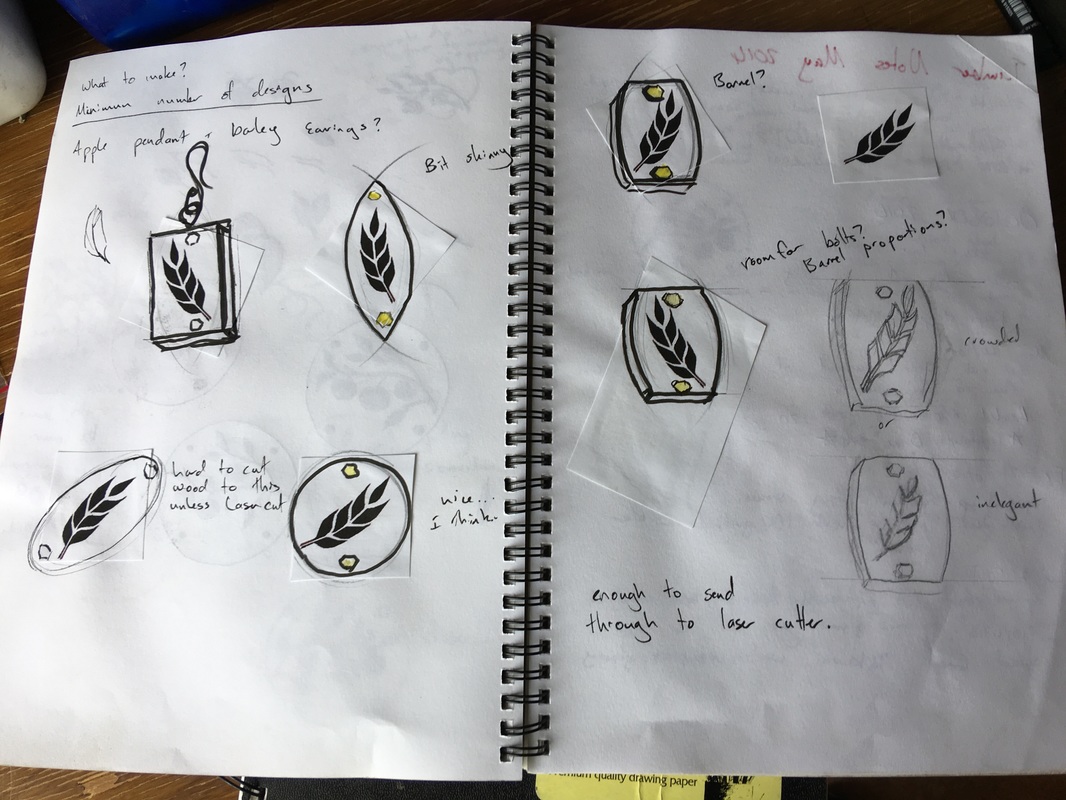
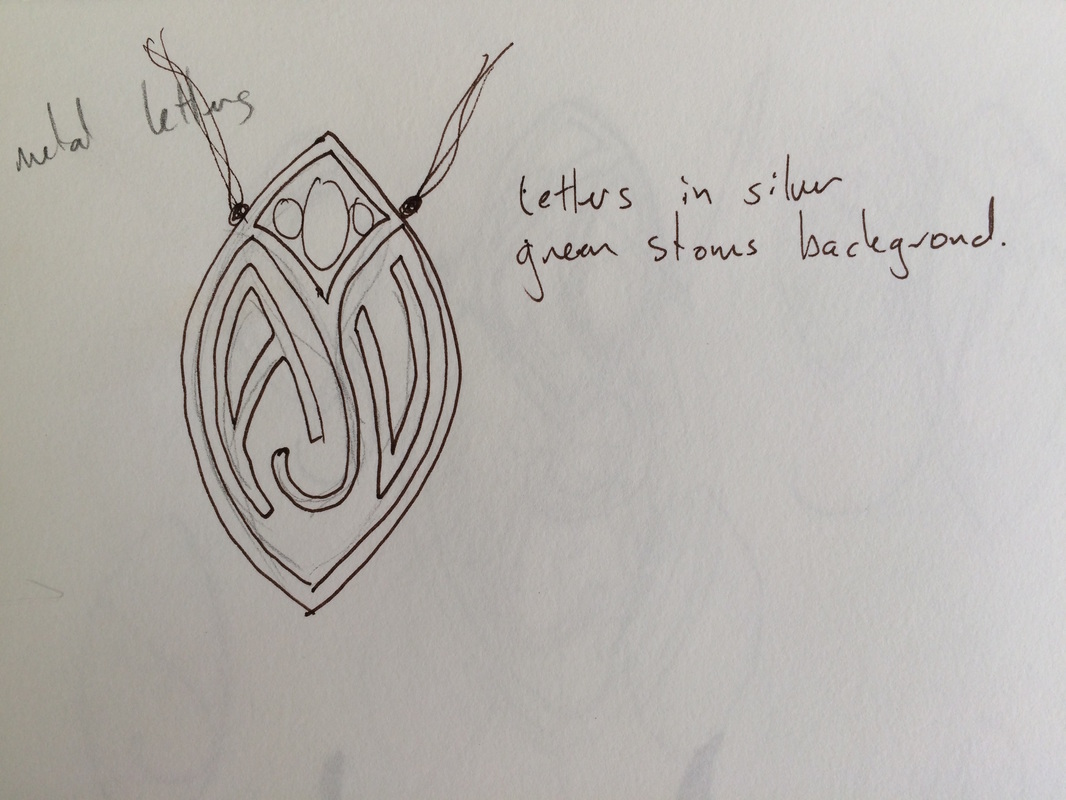
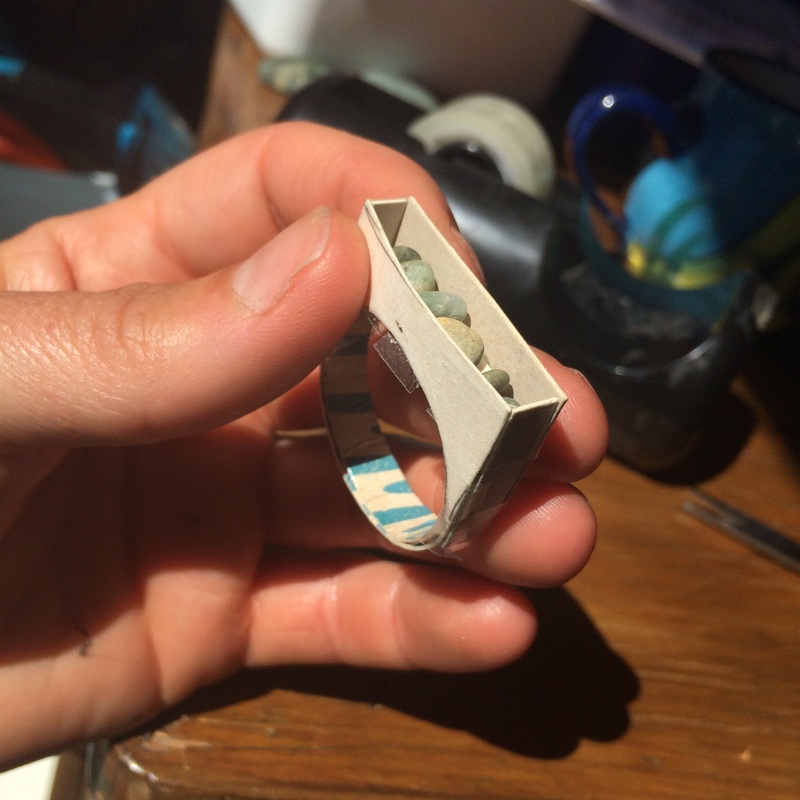
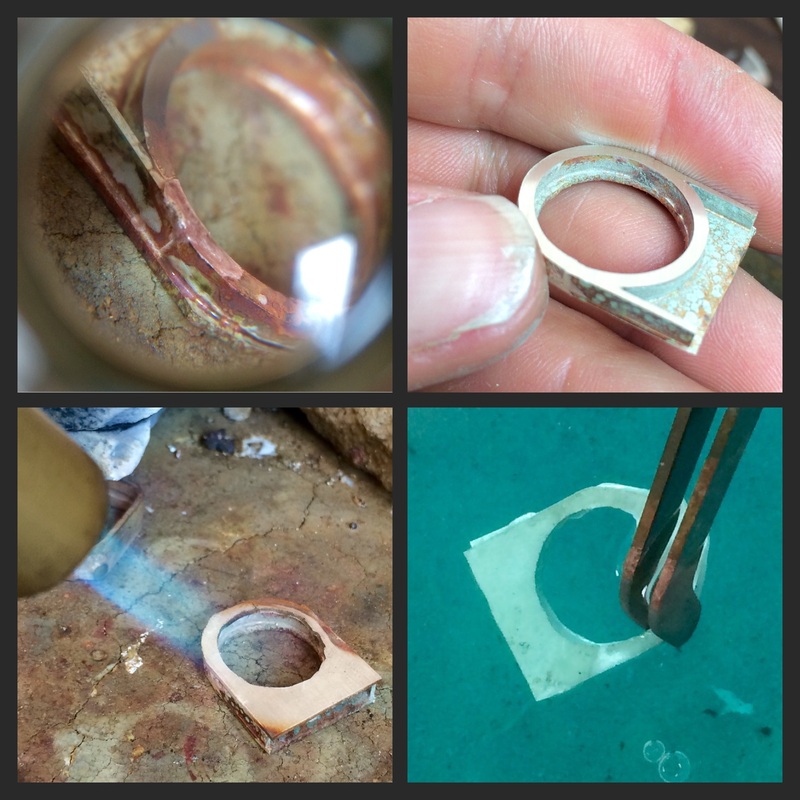
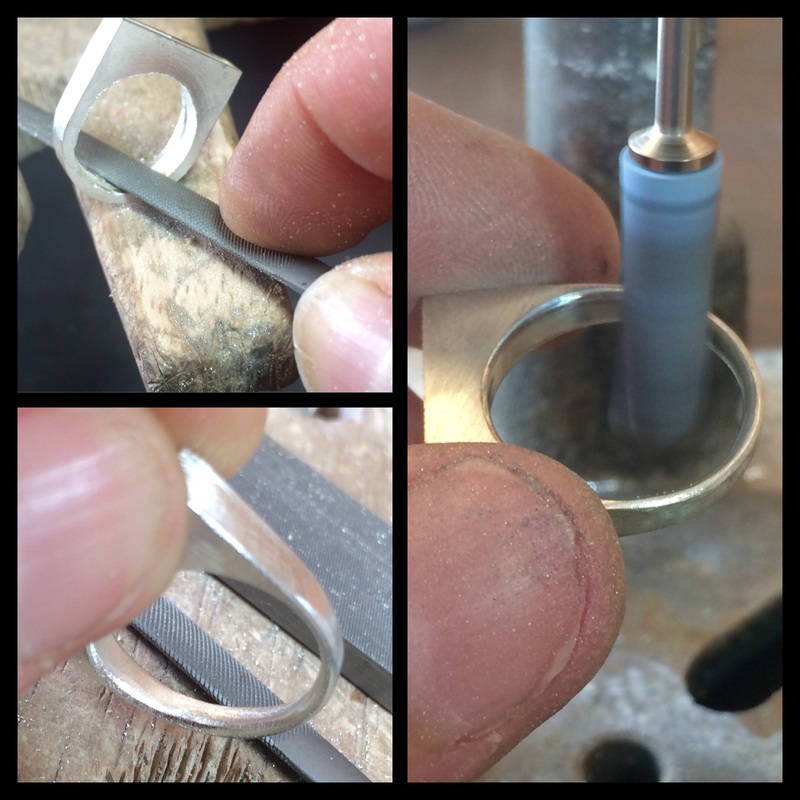
Some of the design process in my workbook

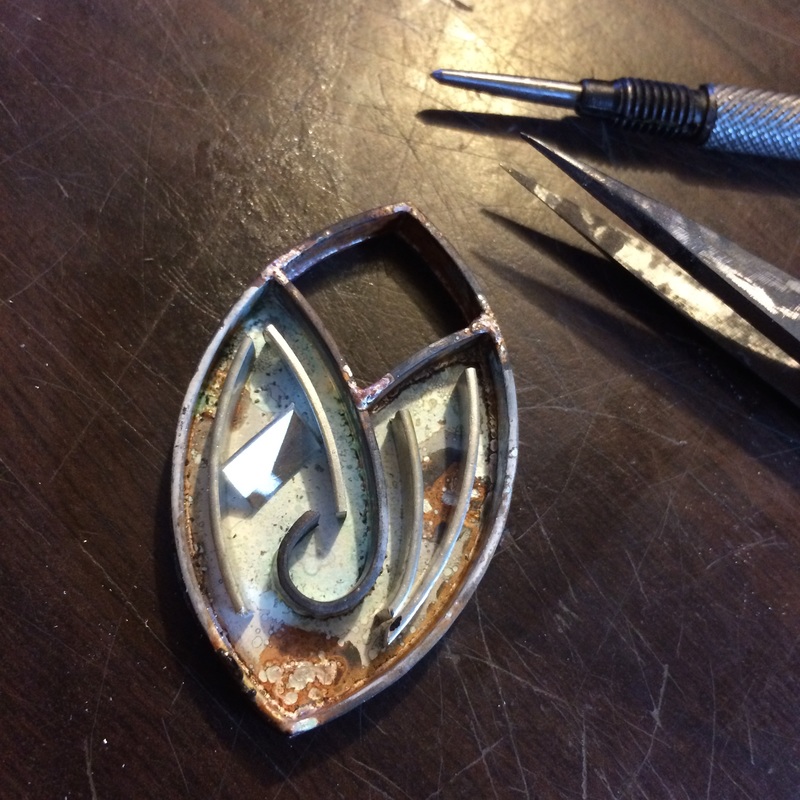
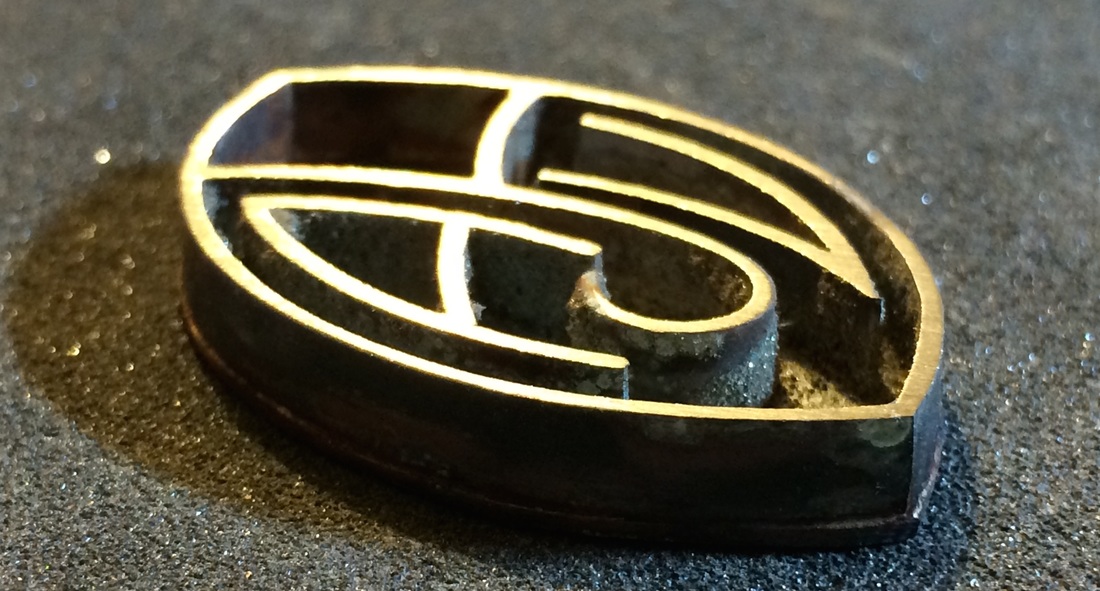
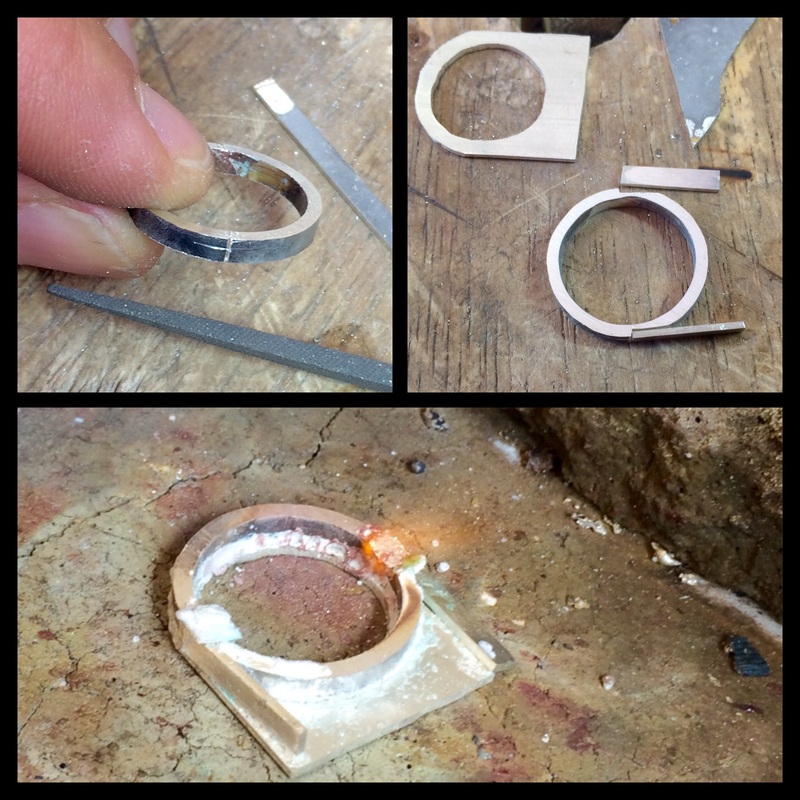
When I finally had the design finalised, the biggest problem, among many, was getting someone to laser cut stainless steel. I talked a bunch of different businesses (staying within New Zealand as I wanted to keep it as local as possible) but not many were prepared to make a small run for me. Unfortunately, I couldn't get the galvanised iron crystalline surface that I wanted as the laser cutting couldn't be accurate enough for my design. Eventually I found one that would do the cutting, had a small test run done, then ordered a big batch. 
Picture
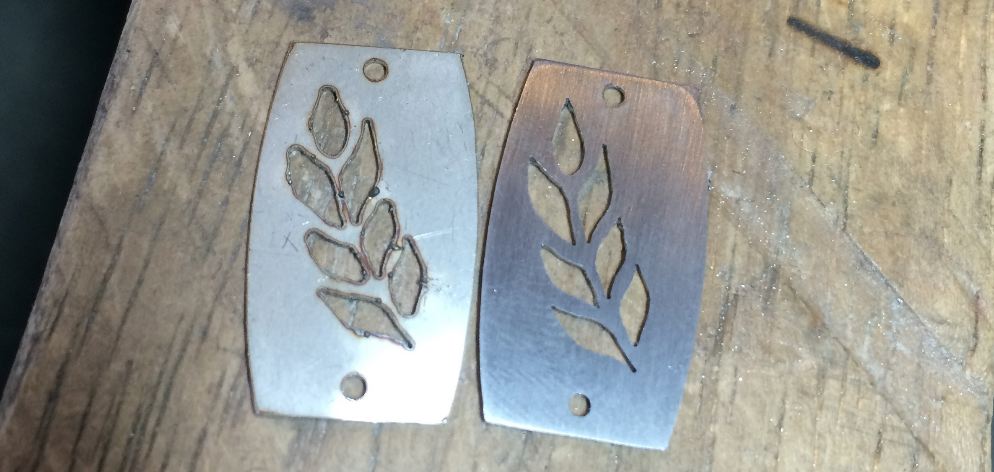
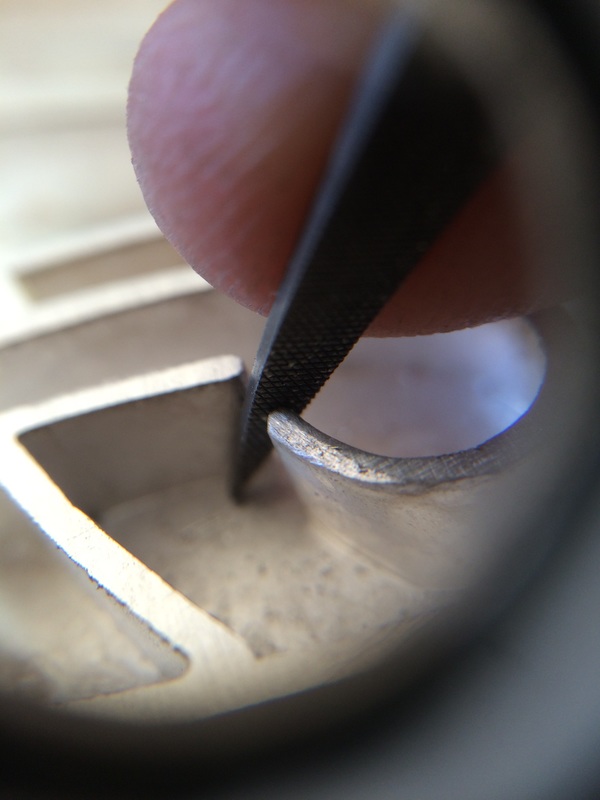
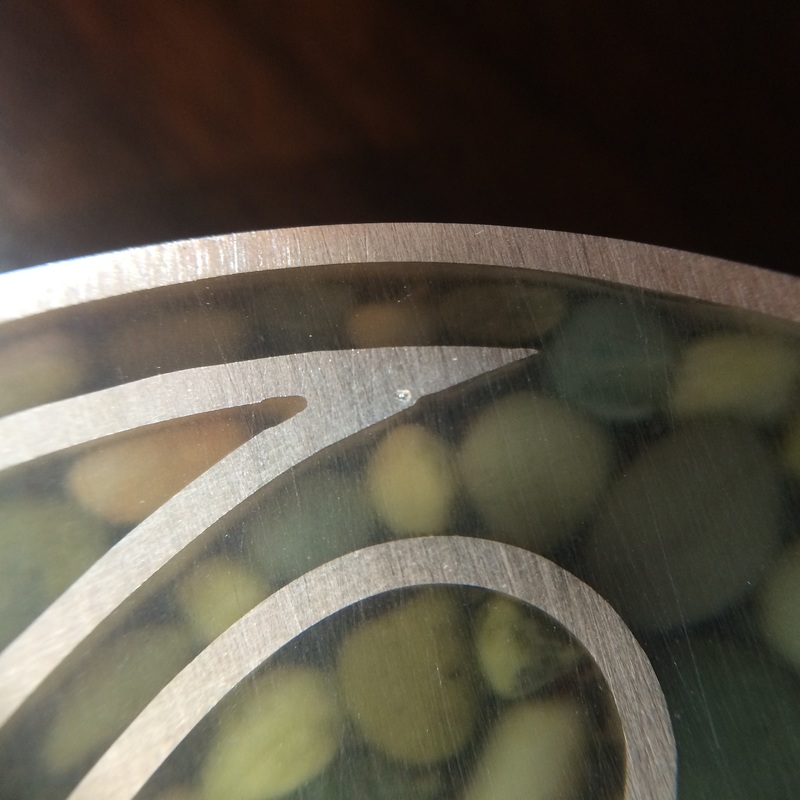
Earring front plate as received from the laser cutter on the left, and after about 10 minutes of work with my needle files and a tiny sawblade.
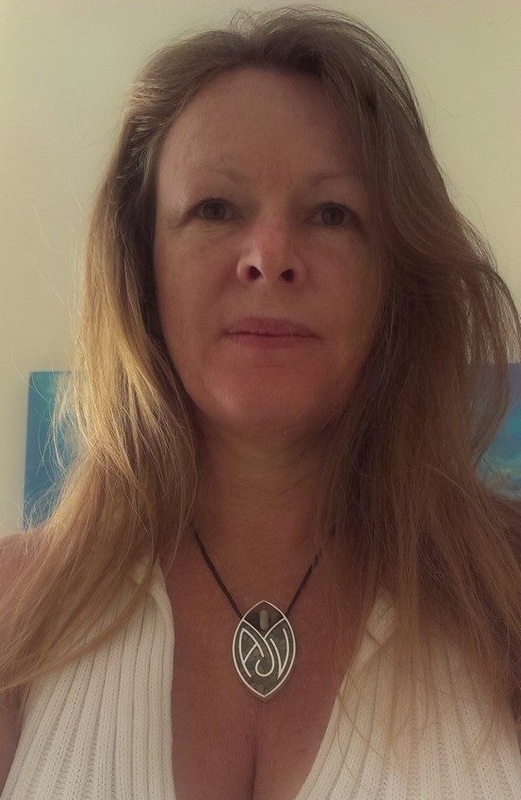
The earrings picture a head of barley, an ingredient of beer, on a shape a little like a barrel. The pendants show three apples on a branch. I especially like Nally's Cider, a crisp, low-carb cider made from heritage varieties of apple, grown near where I live in Arrowtown. 
Picture
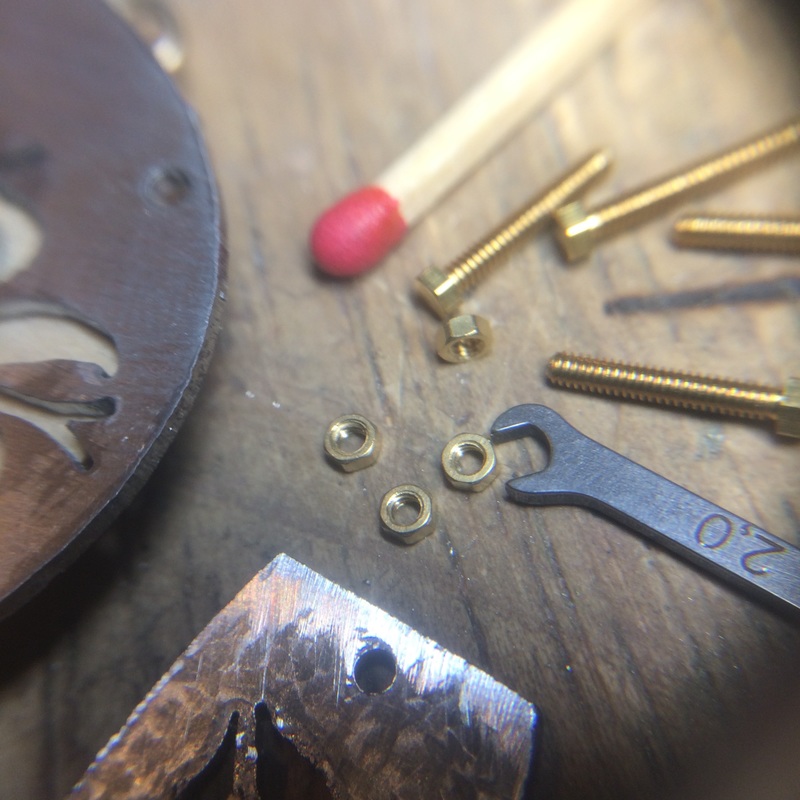
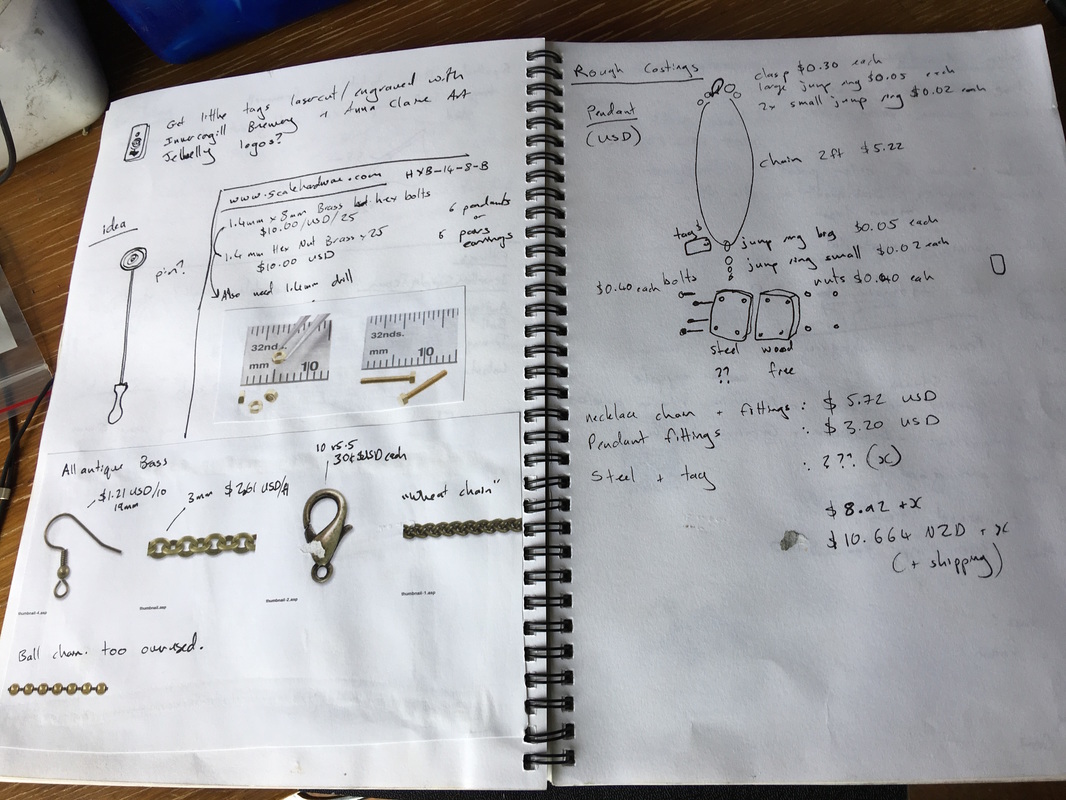
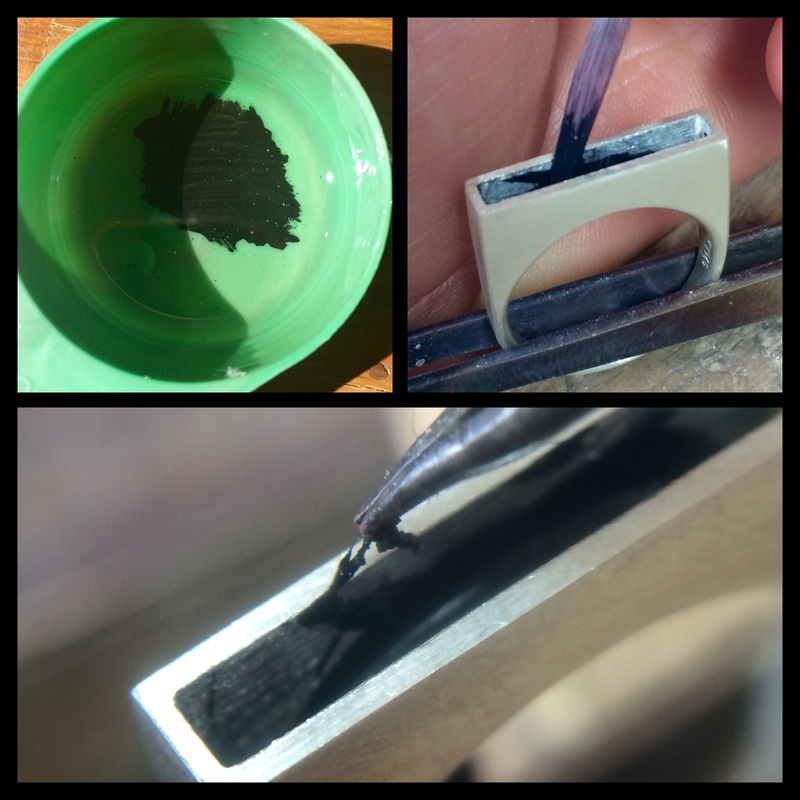
The teensy tiny nuts and bolts that hold the jewellery together. Matchstick for scale.
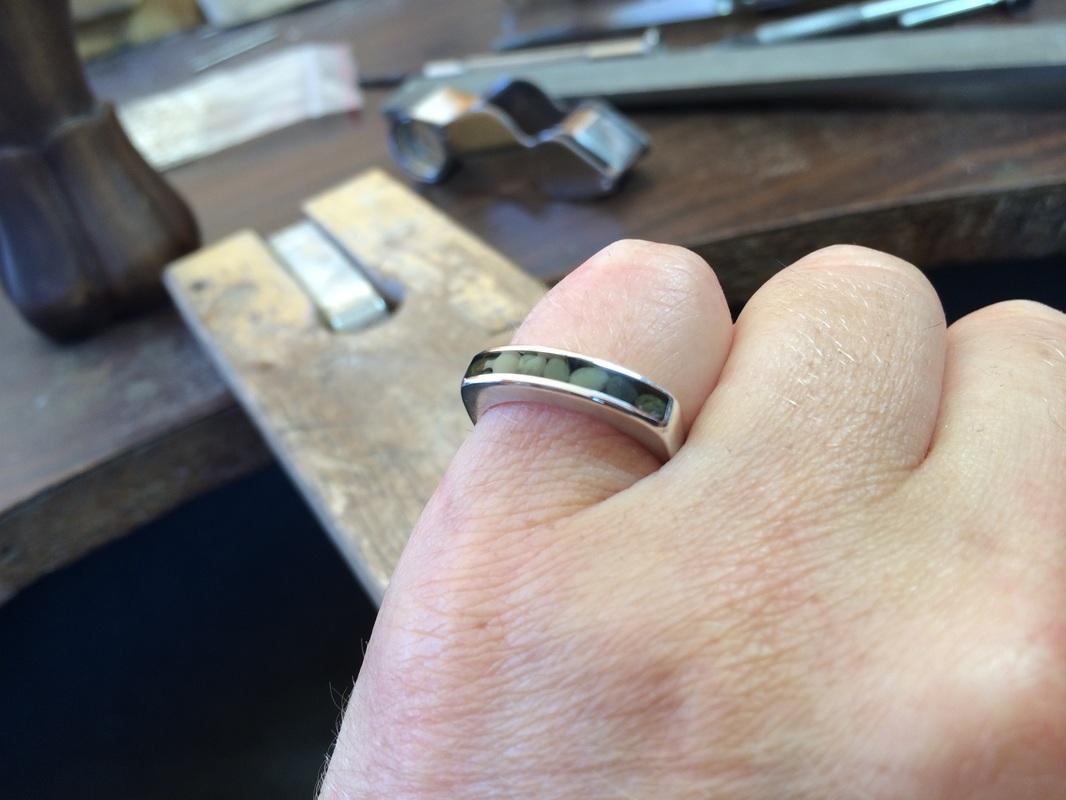
I imported some gorgeous miniature nuts and bolts from a model train supply outfit in England, and washers from Australia. They came with their own little wee spanner and socket wrench. using these tiny tools on the tiny nuts and bolts is my favourite part of making up the jewellery. 
Picture
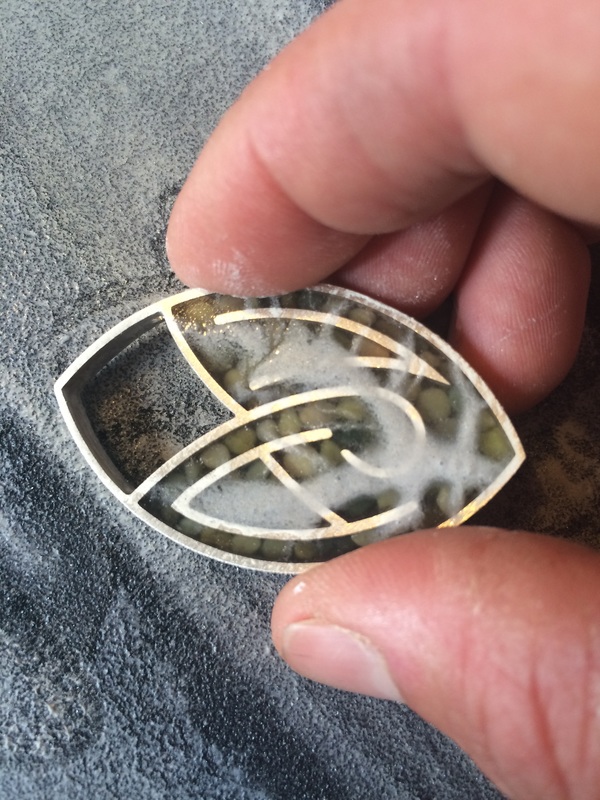
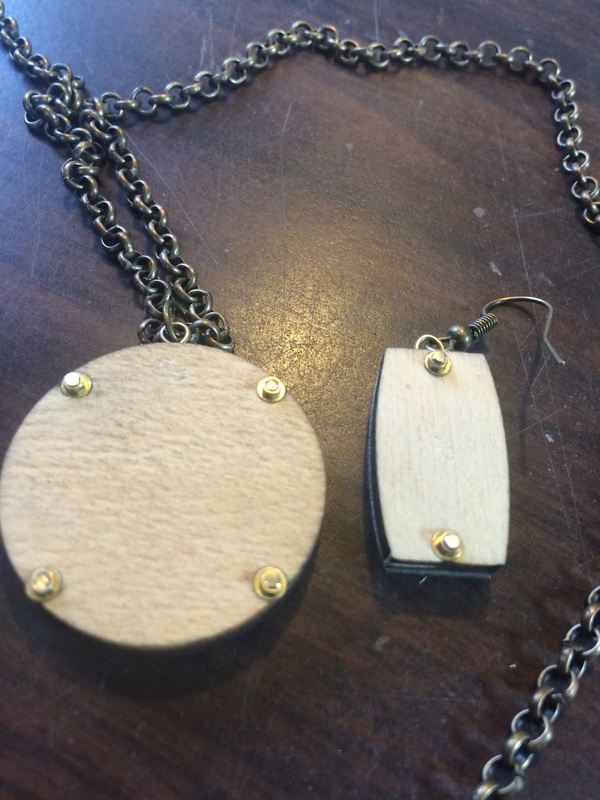
The back of a pendant and earring, showing how it's held together with the bolts and nuts. The washers turned out to be necessary to stop the nuts sinking into the wood.
I carefully selected and brought in the chain, earring hooks, catches and all the other findings. After a few trial runs and ironing out problems that came up (sounds simple but it took MONTHS) I finally had the jewellery ready to go.

The packaging was another new thing to me. After a whole lot of searching, I found a supplier who could stock me with cards and cellophane bags that fitted my product. Happily, I've been able to use them for my next product that involves an industrial process, this time, 3D printing. I also got some stickers made up especially for this packaging. 
As a beautiful finale to the manufacturing stage of the project, my friend Suzannah Maree photographed the jewellery. She had been involved with the finishing and assembling of the jewellery so knew it intimately. Her photos of it are stunning. After being embedded in the problem-solving process for so long, it was wonderfully refreshing to see Suzy's take on my creation. She saw it with fresh eyes, and showed it back to me in these beautiful photographs. ​Suzannah is an accomplished photographer. I'm especially enjoying her new Instgram page featuring intimate wildlife and nature scenes. 
Picture
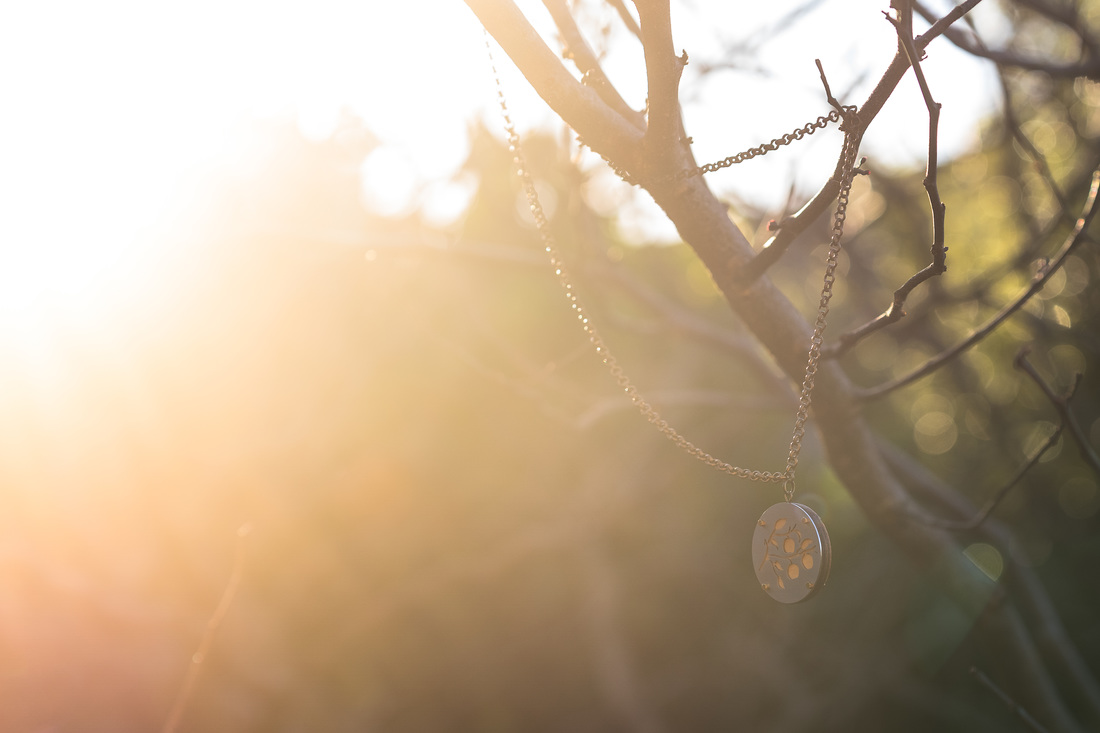
I LOVE Suzy's lens flare in these photos.
Picture
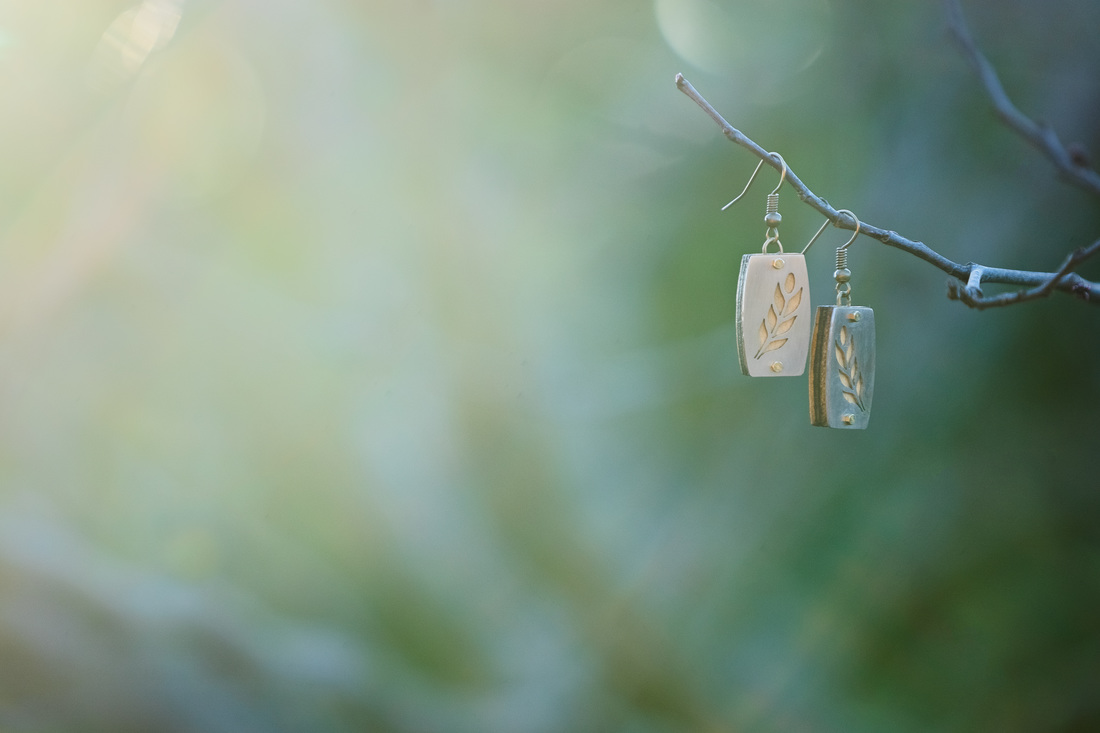
The tree setting is perfect.
Picture
Oh... that dawn light. Exquisite.
Picture
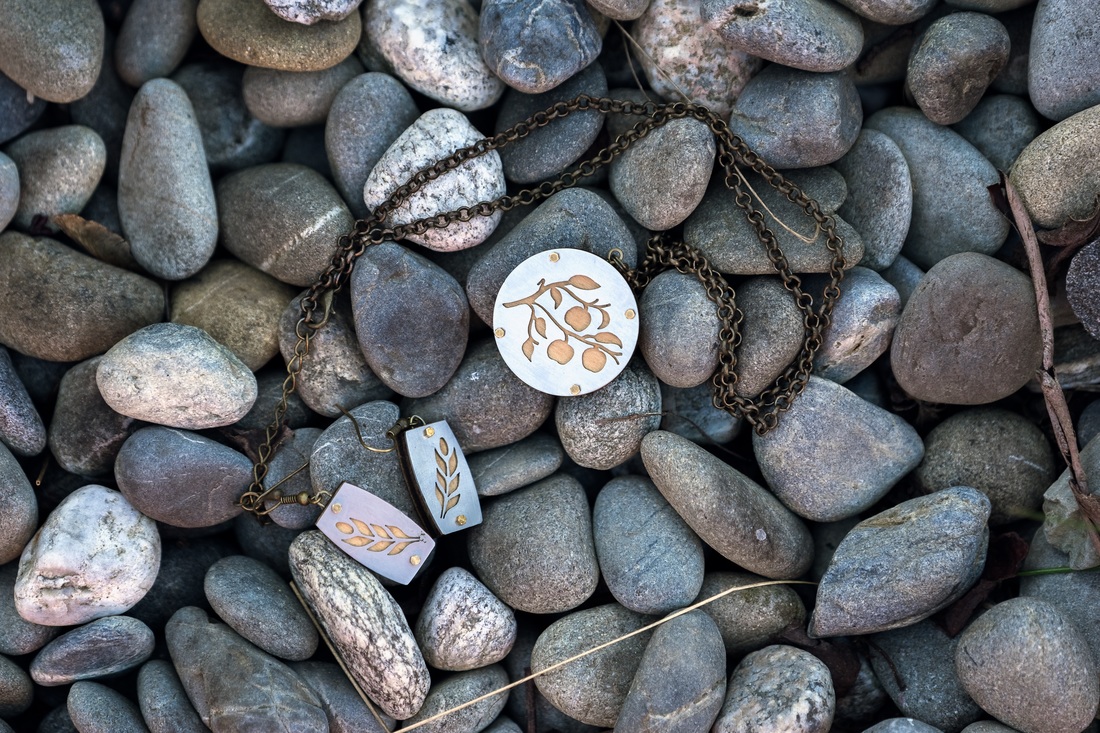
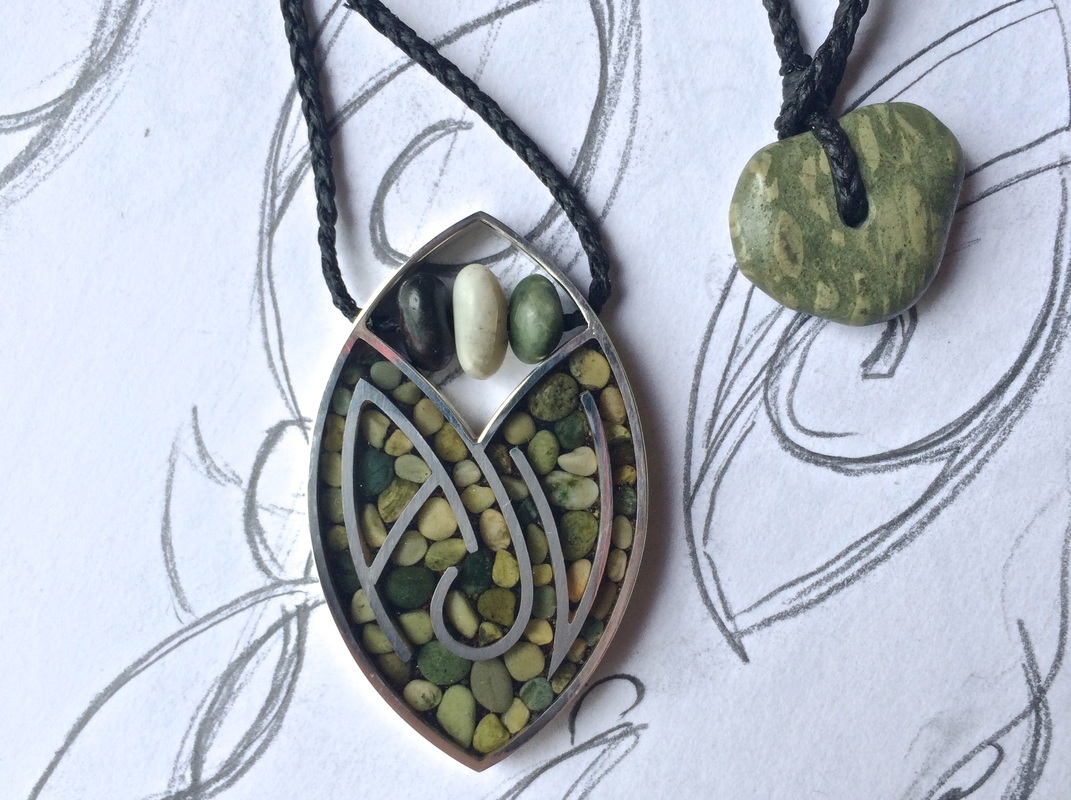
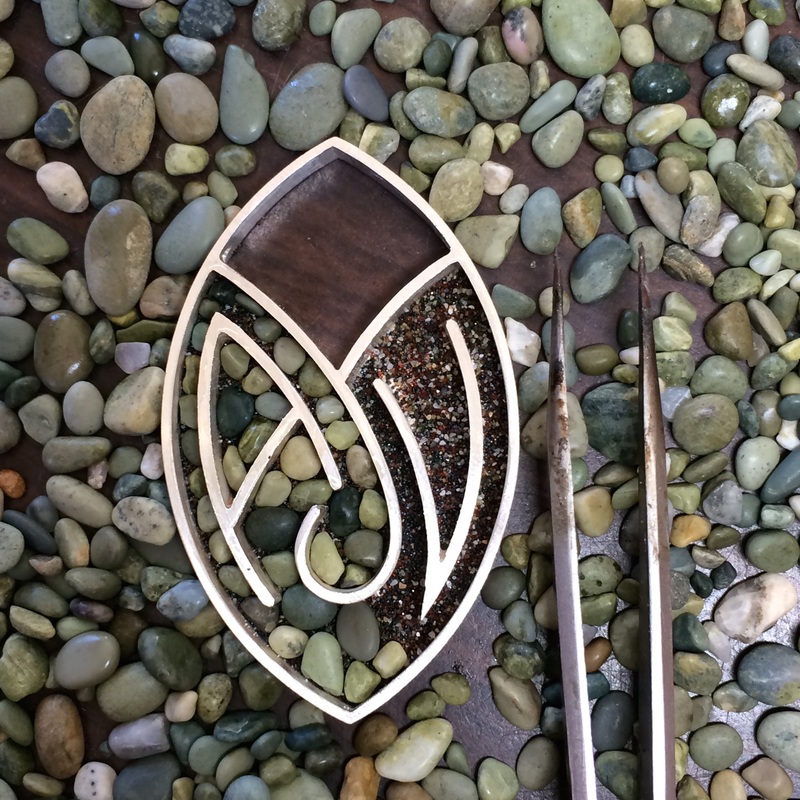
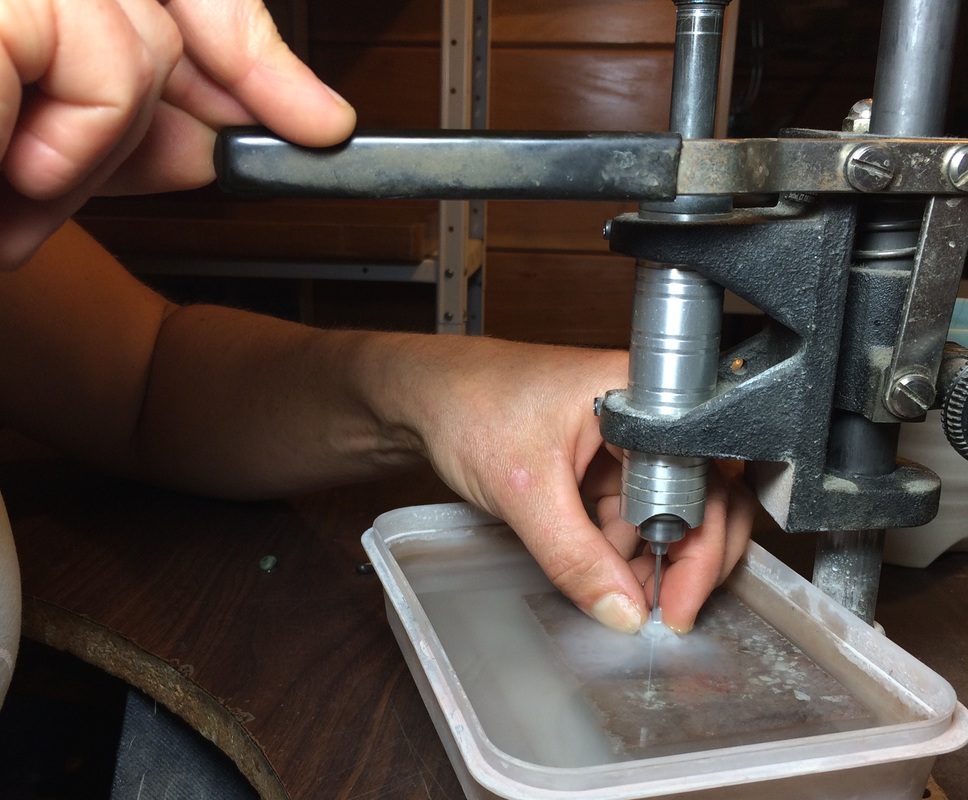
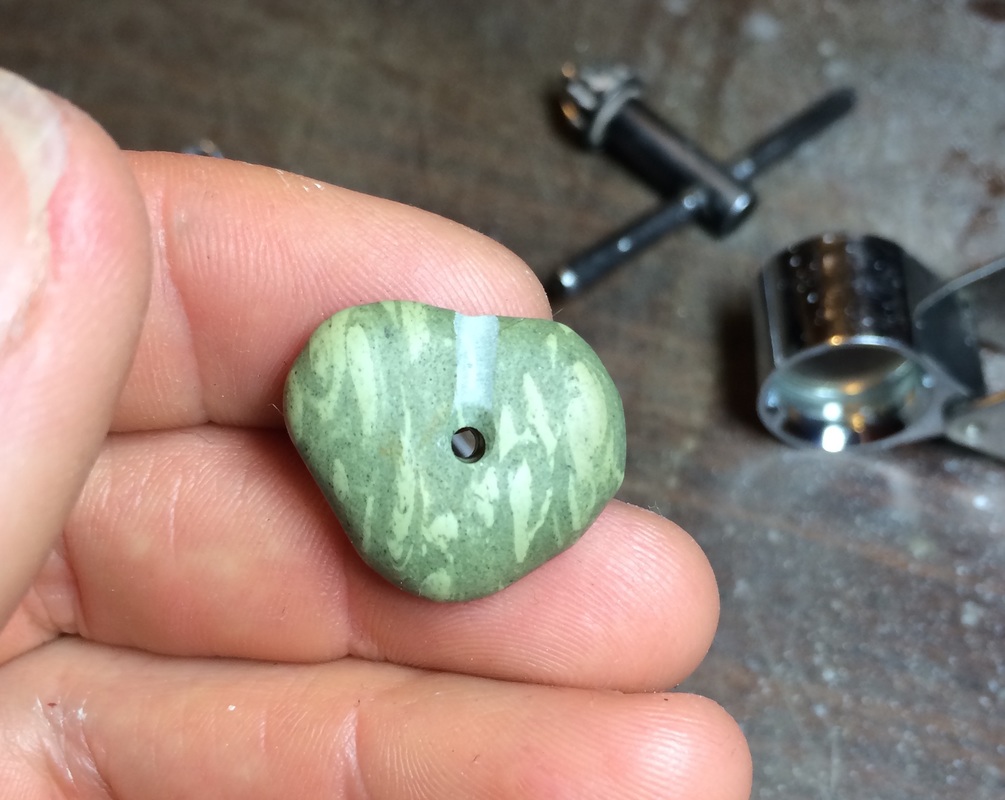
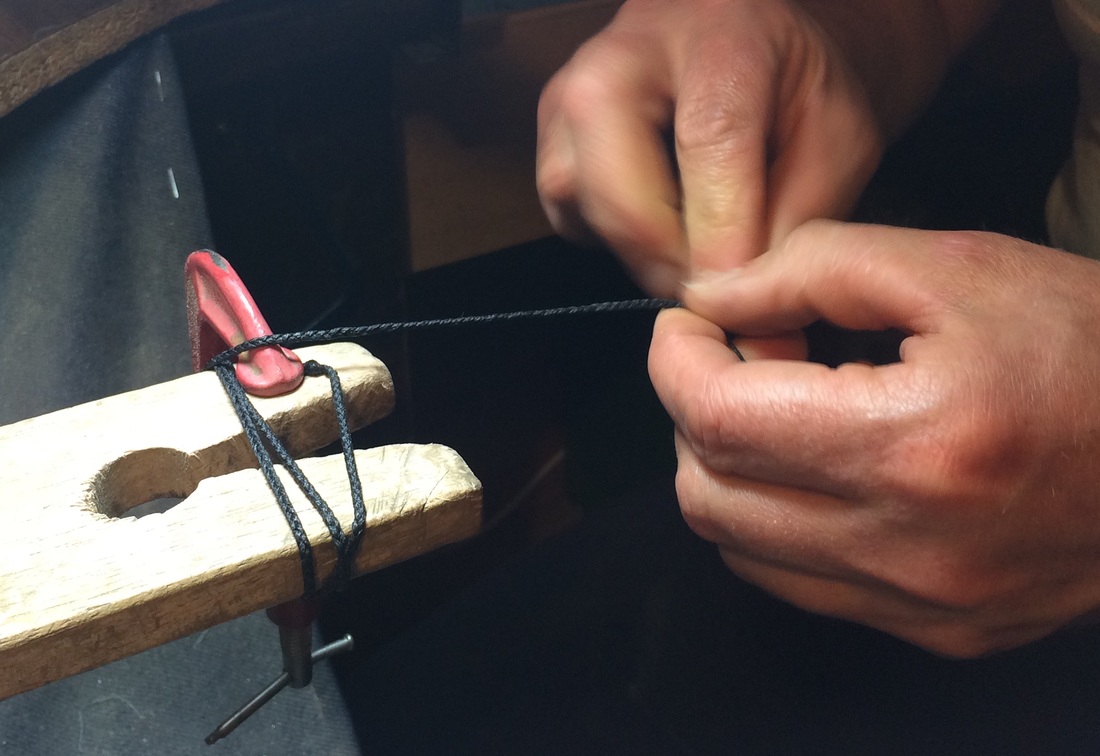
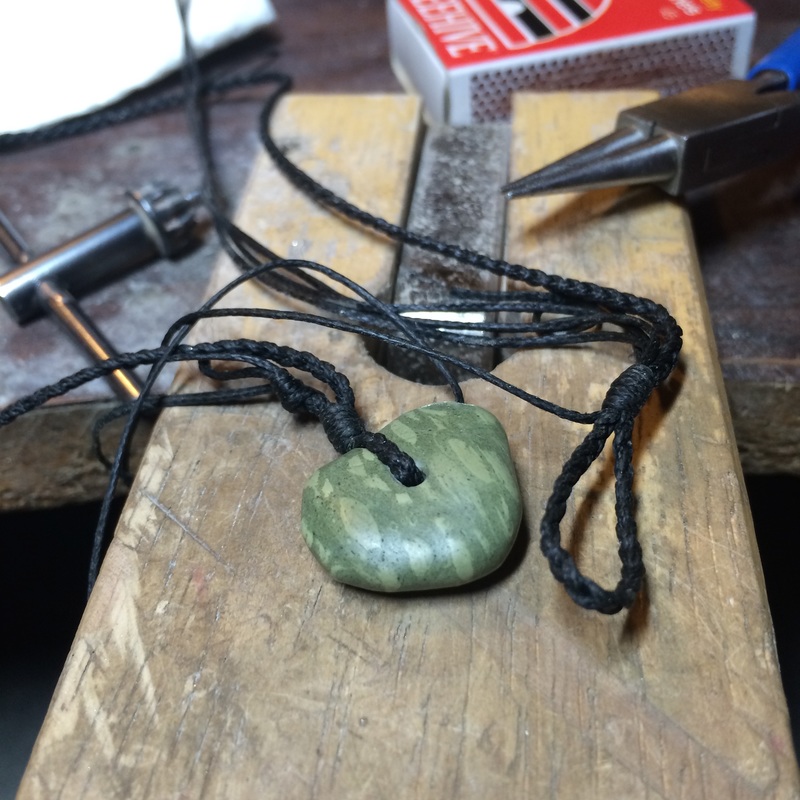
And stones, because everybody likes stones.
Picture
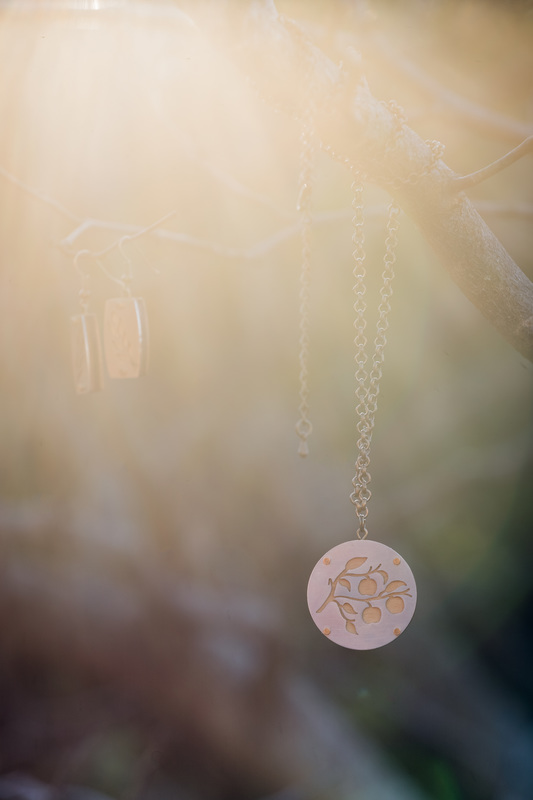
More lens flare, because I can't get enough of that lens flare.

Links

Buy the jewellery here.
Check out Invercargill Brewery and their choice brews here.
Suzannah Maree's Website, Facebook Page and primary Instagram. 
Comments

A Pendant for Heather

21/5/2015

Comments

 
Here is another of my progress photo sets from a special commission I made this last summer.  You may have seen some of these photos on my Facebook page, but here they are in one lot, enjoy! 
Picture
The client, Heather, has three sons whose names start with A, J and K. The brief was to incorporate their initials into a piece of jewellery in a similar style to other pendants I have made, using green stones. Heather had helpfully done some drawings herself so I had a good idea of what she wanted. This was one of my interpretations, getting there but not final form yet. 
Picture
After a while we both settled on this design, with each letter clearly defined in silver strip. The extra metalwork takes more time and materials, and therefore cost a little more than other designs, but it's well worth it to get exactly what the client wants. 
Picture
I only started taking photos at this stage in the metal construction. I was using great big chips of solder (bad jeweller) but this surface with the solder puddles will not be visible in the finished piece. Lots of solder in this instance saves the hassle of cooling, inspecting, finding gaps, resoldering etc. until there are no gaps in the solder seams. 
It was pretty fiddly getting the letters just right. Teeny tiny faults in the quality of line or shape make the whole thing look awkward, so I took my time getting the shapes perfect. 
Picture
The metal is all soldered well in place. Here the top surface has been sanded off flat to inspect for faults in the solder joints. 
Picture
This photo is taken through my jeweller's loupe held right up to the lens of the camera on my iPhone. Here I'm rounding off the ends of the letters ever-so-carefully with the tip of a needle file. 
Picture
The obsessive part of the process starts. I have a collection of tiny green stones, picked one-by-one out of sand. Here I'm figuring out where to put them in this pendant. The base layer is garnet sand from off the beach at Orepuki. It's mostly black but with some other colours and tiny little natural garnets. 
Picture
I've poured in the resin and while it's still liquid, I use a saw blade (jeweller's size saw blade, of course) to poke around to release any bubbles and put back any stone or sand that have been disturbed by the resin pour. 
Picture
After a few days sitting in the warm sunlight on the windowsill in my studio, the resin is set hard. I sand it off flat using wet and dry emery paper with a little water in reducing grades of grit. 
Picture
Oh dear, a fault has shown up. Even though I had the metal perfect before the stones and resin went in, sanding off the top of the resin takes the metal down a bit further and sometimes irregularities are exposed, such as these. It's annoying, but I keep sanding until it disappears. 
The surface is sanded down to 800-grit paper and then polished on the bench polisher. To see what that looks like, go here. (This page I have doesn't let me put videos right in posts yet.) 
Picture
I have a collection of bigger green stones. Here I'm figuring out which one or ones to put in the gap. 
Picture
I've chosen stones for the gap and a bigger one for the toggle. Here I'm drilling through a stone underwater, using a diamond drill in the handpiece of my flex-shaft, which is fixed into a drill press. The water is essential for cooling, lubrication and carrying away the ground-up stone.
Picture
Check out this amazing stone. It's naturally heart-shaped green argillite with fossil worm casts all through it. I *think* (please let me know if you know more than me) that is from the Permain Brook Street Terrane, laid down as sand and mud 250-280 million years ago. The lighter green streaks are from where ancient worms who had ingested lighter coloured mud pooped it out in the darker green mud before it was metamorphosed into rock. 
Carving a hole and groove into an ancient, fossil-bearing stone initially felt sacrilegious. But I've decided that they are better being used in jewellery, even if it means altering them such as I have here. Fossil worm casts in argillite are actually quite common among the beach stones at Orepuki. I have a another couple of stones like this in my collection currently, and I have used a few more in jewellery. They are out in the wide world being loved and appreciated right now, rather than stowed away in a shoebox being too precious to use.
Picture
Plaiting the cord, at night, as usual. 
Picture
Attaching the toggle stone and making a loop in the plaited cord using a technique called "whipping." 
Picture
The finished pendant, photographed on some of the the concept drawings. 
Picture
Heather, the client with her new jewellery. She told me she loves everything about it. I love my job. (Photo used with permission) 
Comments

Eternity Ring Construction

2/4/2015

Comments

 
Occasionally when making an interesting new project I'll take photos all though the process, collate them and put them up on my Facebook Jewellery Page, Anna Claire Art Jewellery. Quite a lot of people seem to really like following along and I love sharing it. The only drawback my job as an artist is working alone, but when I share some of what I do it's not so lonely. 

This here is a series from the Facebook page all put together into one bog post. Enjoy!

The Process

After consultation with the client about the design, I worked out the nitty gritty of it. I haven't made something quite like this before, and I've learnt from experience it's best to figure out what I'm doing before I start.
Picture
One of the first things to do is knock up a cardboard-and-sellotape model to check that my 2D drawing and 3D idea in my head are of the same thing:
Picture
Making the ring shank. Instead of cutting a wire to length, I cut out a strip of sheet to get the proportions exactly right. It's bent so the ends meet, then soldered and forged so that it's round. This one needs to be size M when it's done, so to size it I had to saw it open and re-solder a few times. I've made it a bit smaller than M, because material will be removed from the inside of the shank by the end of the whole making process. 
Top right pic is the shank after I've sanded the sides flat and smooth.
Picture
The ring shank is just right and flat on both sides, so next I measure and cut out the sheet silver for the sides of the ring.
Picture
Here I've marked the ring shank where I want the narrow sides to fit in. I cut them out of sheet, file notches in the shank to fit, and solder the shank, sides and front plate together:
Picture
I used a jeweller's loupe to inspect the solder joints. They're good, so I sand it flat and solder on the back plate. When I'm sure all the solder joints are of the upmost integrity, it goes in the pickle (sulphuric acid solution) which removes the flux and whitens the oxidised silver.
Picture
All the soldering is done and it's time to shape it. In the first pic I'm using a fishbelly file to make the shank oval. 
With my other rings that are wider, I use a 2.5mm wide band in a rectangle shape to keep the ring stable on your finger. This one will be quite small so I'm making the shank oval. It feels extra nice when you slide it on your finger. 
Also using some little rubber sanders to make it beautifully curved and smooth.
Picture
Here's the hallmark: my ACT stamp and 925. 
The ACT stamp is my initials in a simple design to show I made the work. The 925 signifies sterling silver, which is 925 parts pure silver and 75 parts copper. It is illegal to mark anything that is not sterling silver with this stamp.
Picture
Usually I set my little stones on a bed of black and red garnet sand, but with this ring there just isn't space for sand grains. The stones definitely look best on a dark background, so I decide to paint the bottom of the ring setting. 
First pic is a tester of the acrylic paint under resin, it appears stable so I painted the bottom of the ring. I didn't have a small enough paintbrush to be accurate, so bottom pic is me removing paint that got on the side.
Picture
I spent ages finding the right stones. They had to be the right size to within 0.2mm, then to be good colours and fit in well together. 
Then when I'm finally happy with the arrangement, I mix up and pour in the resin. Bottom left pic it's almost set.
Picture
Pic 1: Using a compass to mark about where I'm going to file. 
Pic 2&3: the ring is in a vise and start filing. I'm pretty nervous at this stage. I hadn't made a final decision about the exact shape of the top of the ring before now, so I'm working slowly and thinking hard, making judgement calls as I go. I can take material off but not put it on again! 
Pic 4: When I'm satisfied with the overall shape I sand by hand to get the curves smooth.
Picture
I polish the inside and outside of the ring and inspect it closely for any faults in the polish. All good, so the I use a Scotch-Brite pad to make a matt finish on the sides. The matt contrasts with the high polish to make it sparkle even more.
Picture
Final polish with the good polishing cloth that's saved for final polishes, check the size (a perfect M, excellent), photograph it and send it away. 
Another of my babies sent out into the big world, to go on adventures with its wearer.
Picture
Another pic of it all done. Very pleased with how it's turned out. 
Picture
Comments

    Author

    Anna Claire Thompson is an Artist, a mother and a strength athlete. 

    Archives

    November 2016
    September 2015
    August 2015
    July 2015
    June 2015
    May 2015
    April 2015
    March 2015
    February 2015

    Categories

    All
    Art
    Competition
    CrossFit
    Exhibitons
    Interviews
    Jewellery
    Jewellery Construction
    Kids
    My Business
    Nutrition
    Powerlifting
    Recipies
    Remarkables CrossFit
    The Open
    Writing

    RSS Feed

Powered by Create your own unique website with customizable templates.