
I recently completed a commission for a lady's sixtieth birthday, a gift from her three daughters. Here's the progress pics and explanations, as published on my Facebook Jewellery page but condensed into one blog post here.
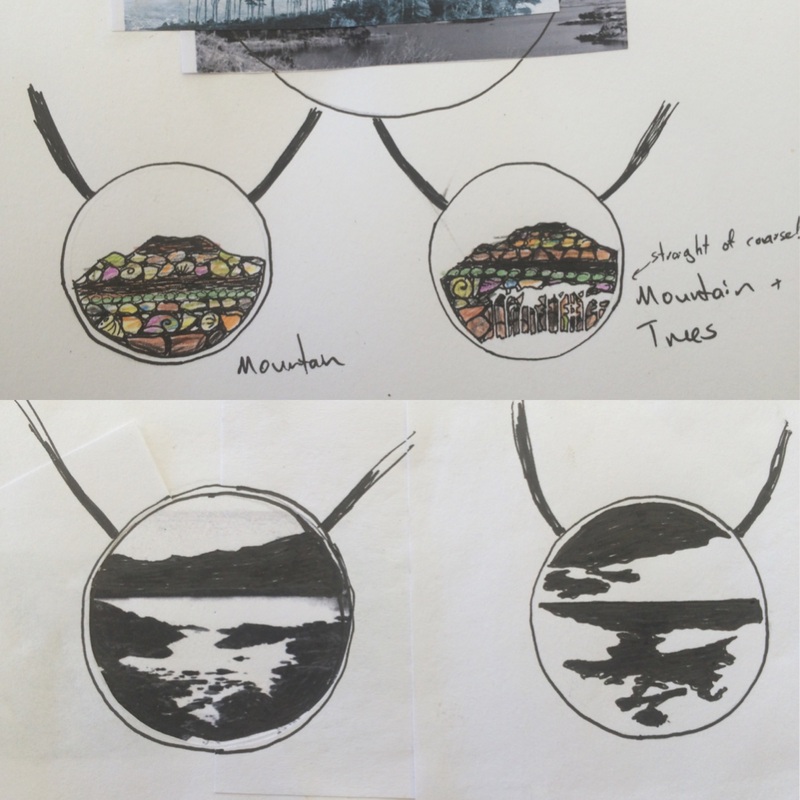
One of the daughters and I consulted to come up with a design that she would like incorporating some elements of her home in Connemara, Ireland. I used a combination of photos supplied by the client and online image searches to come up with some initial designs.
Once we've decided on a design, it's time to start the metalwork!
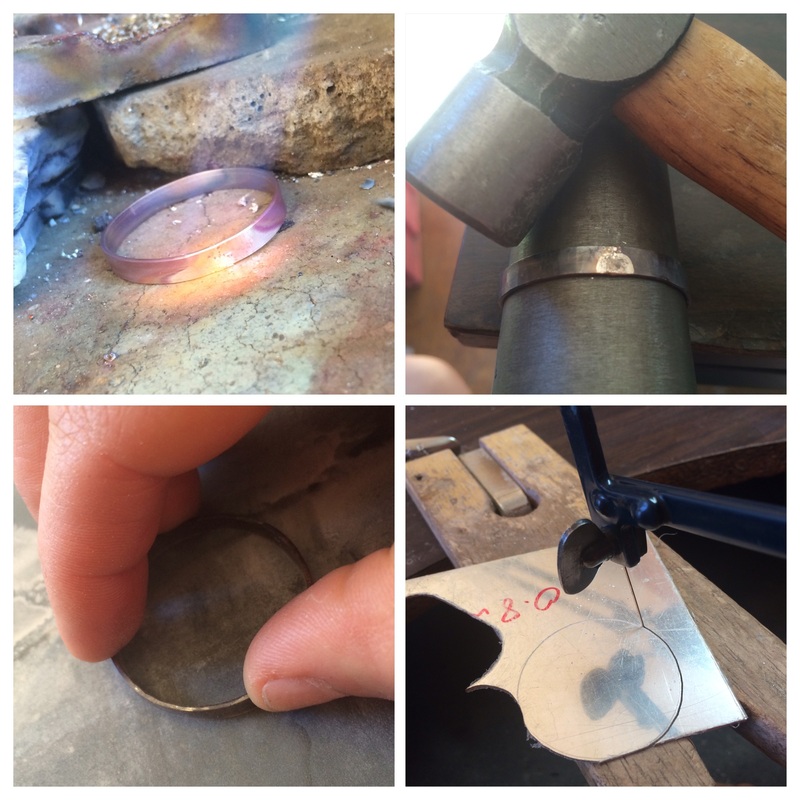
Pic 1: After calculating the length needed, I cut a strip of 1x5mm silver, bend it into a rough circle and solder closed. The blue flame is from my LPG soldering torch.
Pic 2: Put on my 'baby bracelet' mandrill and forged into a perfect circle.
Pic 3: It's gently hammered mostly flat on the top of an anvil, then here one side is being sanded to be perfectly flush.
Pic 4: I traced around the circle onto some 0.8mm silver sheet using a scriber, then in this pic cutting the circle out of the sheet with my piercing saw.
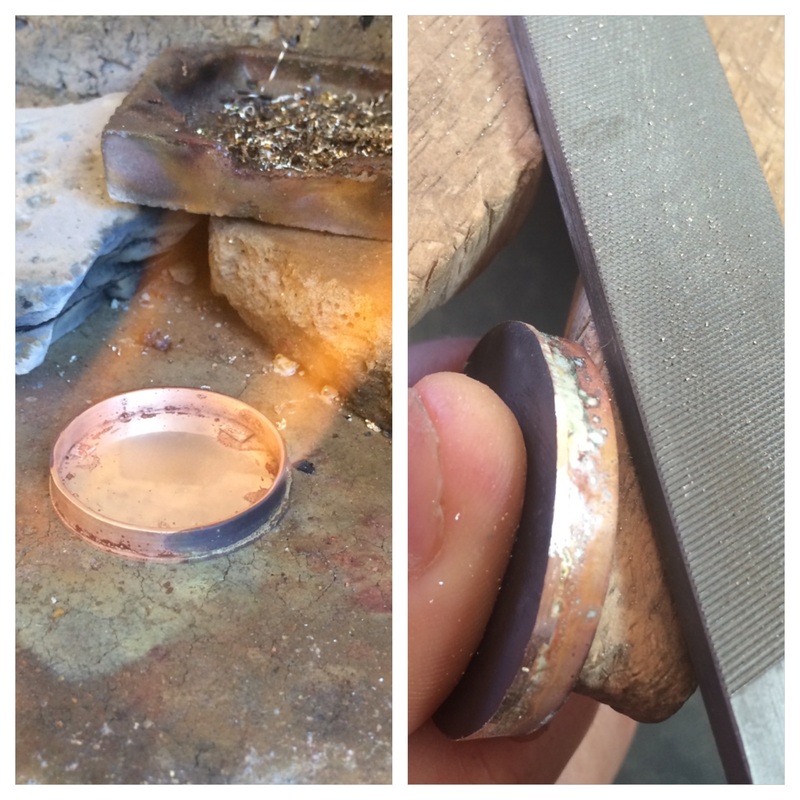
Soldering the top surface of the piece to the sides, then a quick tidy up with a rough file.
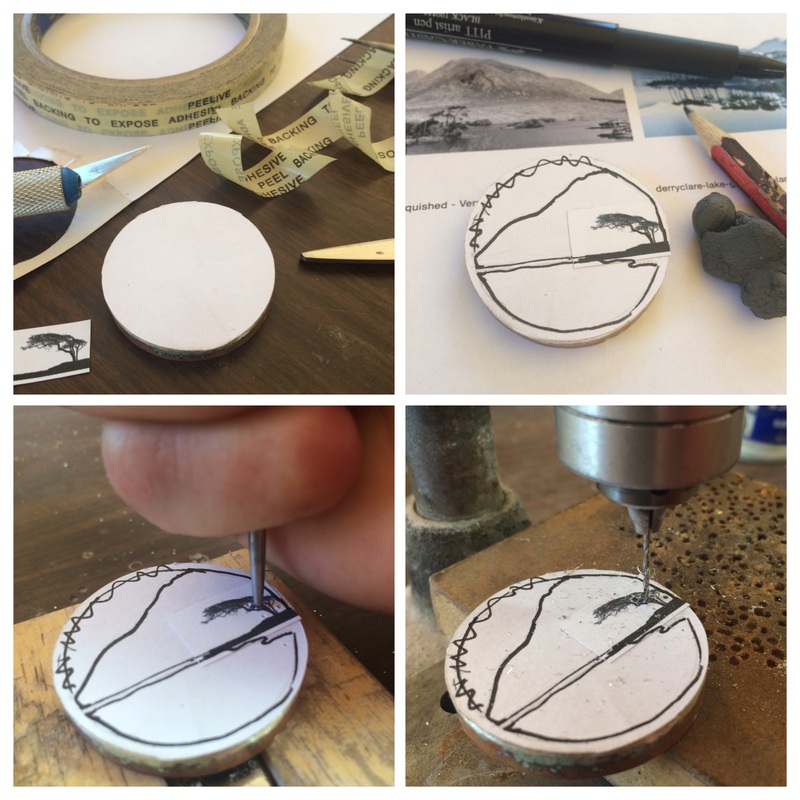
Pic 1: Double-sided tape to stick paper to the top side of the piece.
Pic 2: With a combination of drawing from photographs and an image that I've digitally manipulated, I lay out the design on the surface.
Pic 3: Punching dints ready for drilling.
Pic 4: With my smallest, sharpest drill bit in the drill press, I very carefully drill the places where I'm going to start cutting.
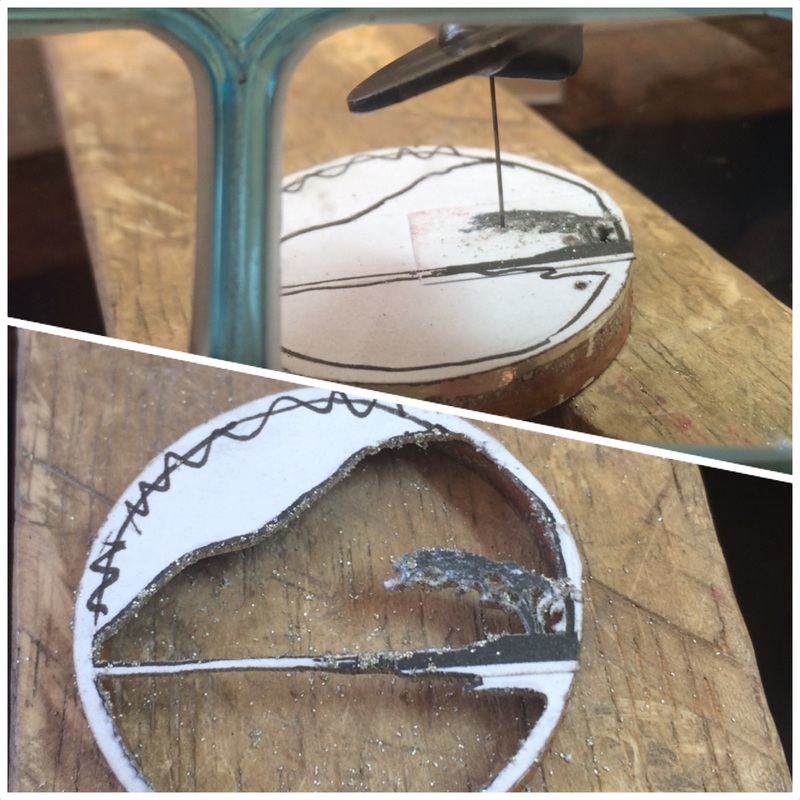
With the design mapped out and holes drilled, I carefully, slowly cut it out using the piercing saw and a thin saw blade. The top pic is taken through the lens of the magnifying visor that I wear while doing work like this.
The bottom pic shows the cutting finished. It's hard to see the detail with the jagged edges of paper and the metal crumbs stuck to the sticky tape, so I'm constantly blowing on it and sweeping it with a paintbrush while I saw.
The bottom pic shows the cutting finished. It's hard to see the detail with the jagged edges of paper and the metal crumbs stuck to the sticky tape, so I'm constantly blowing on it and sweeping it with a paintbrush while I saw.

Then I pull the paper and tape off and set about perfecting the edges using various saw blades and needle files. It's funny how tiny, subtle changes in the line quality will change the imagery. The difference between a filed edge and a sawn edge, that you can barely see with the naked eye, will change the way the line is interpreted.
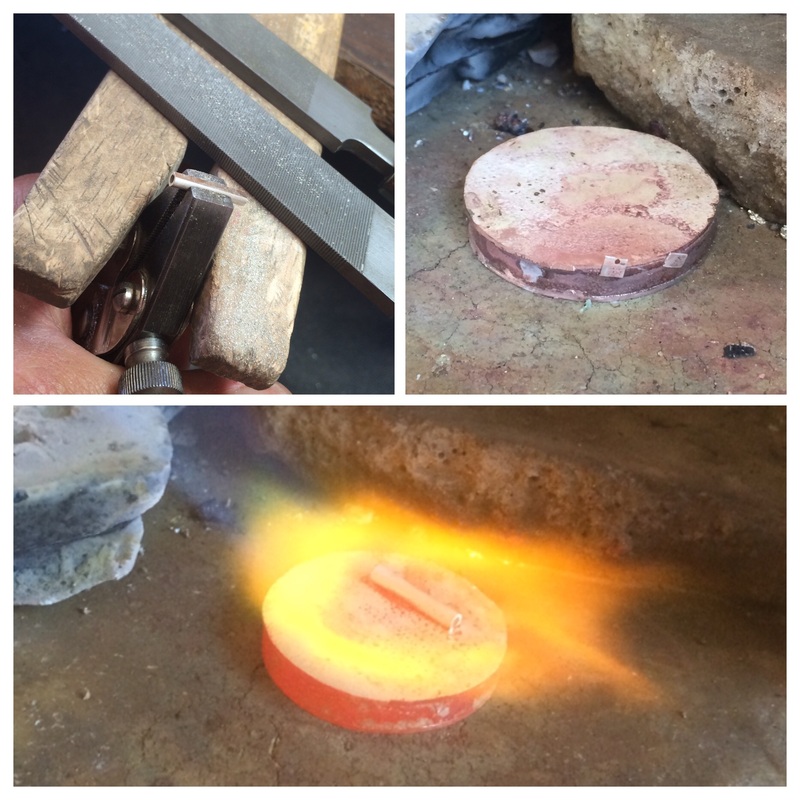
The design for the front surface is done, next I carry on building the rest of the thing. I trace around and cut out a circle for the back (not pictured) and attach a tube for the cord to go through. I use chenier, what we call silver tubing. First pic I'm filing one side of the chenier flat ready to attach it. Second pic has the back about to be soldered, you can see the chips of silver solder. This needs to be done with the piece upside down to protect the tiny details of the cut out image on the front from melting under the heat.
Bottom pic is the flame on the piece as its at soldering temperature. With it upside down, I can't easily see when the solder has melted and is flowing properly, so the colour of the flame helps me know what stage the solder is. Here the whole piece will be at about 750 degrees C, just enough for the solder to flow without melting any of my fiddly piercing work. The green tinge in the flame is from the flux, and the orange only gets this bright close to melting point.
Bottom pic is the flame on the piece as its at soldering temperature. With it upside down, I can't easily see when the solder has melted and is flowing properly, so the colour of the flame helps me know what stage the solder is. Here the whole piece will be at about 750 degrees C, just enough for the solder to flow without melting any of my fiddly piercing work. The green tinge in the flame is from the flux, and the orange only gets this bright close to melting point.
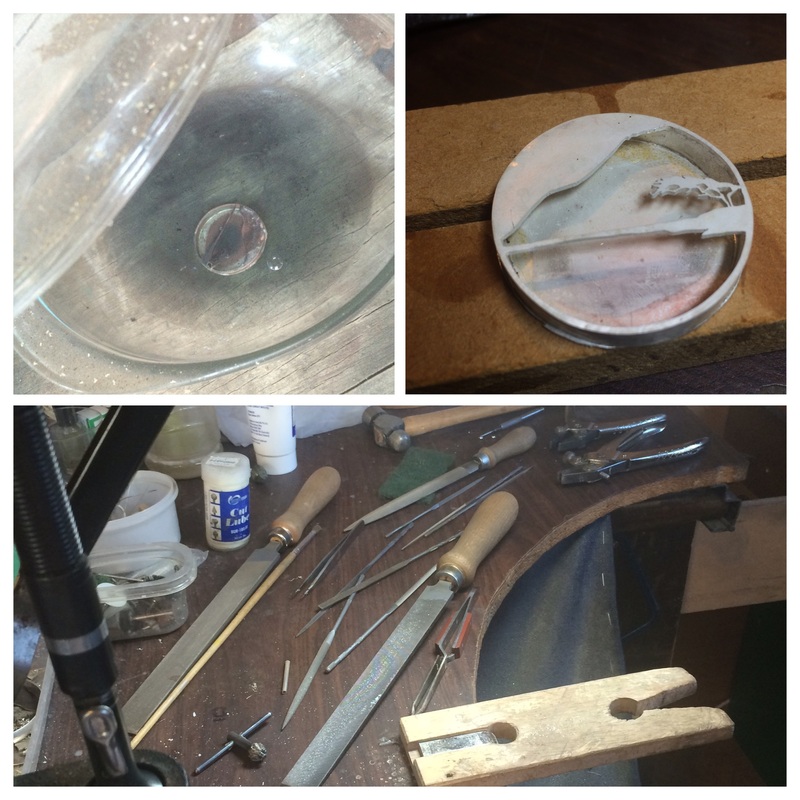
The hot work is finished. After its cooled, it gets popped on a sulphuric acid solution (the 'pickle') which dissolves the flux and removes the tarnish that happens with all the heat. It comes out white but not perfect, so next the surface is cleaned up with files, sandpaper and scouring pads.
Bottom pic is the tools on my bench from the cleaning up stage.
Bottom pic is the tools on my bench from the cleaning up stage.
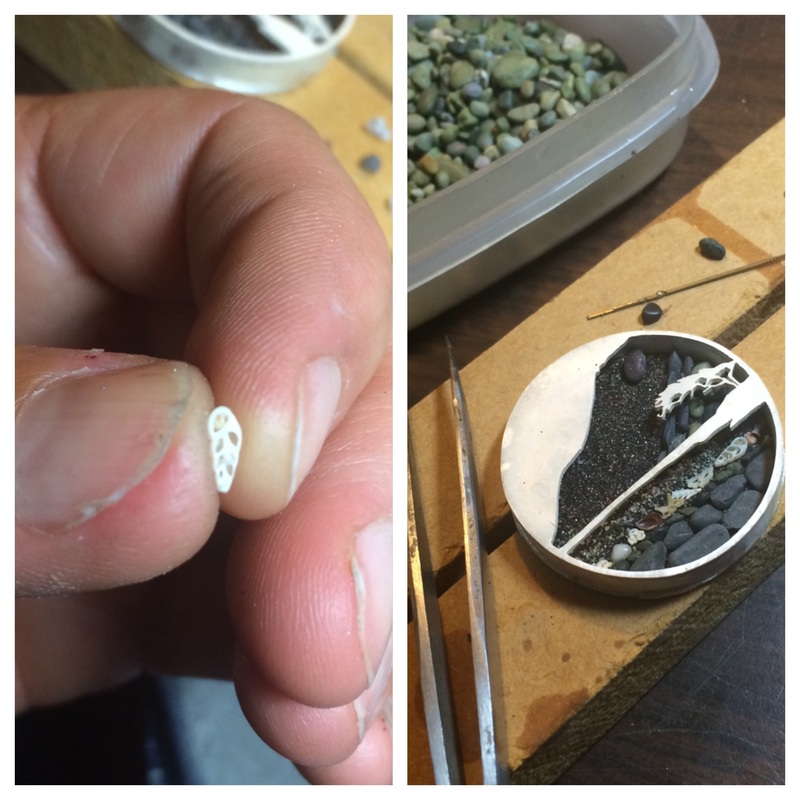
The metalwork is 100% done, so we get onto the filling. The client had asked for it to be like the bog that is intrinsic to the land in Connemara. I start with a base of sifted, fine sand, then layer up pebbles and shell like the layers in a bog.
I filed this wee periwinkle down to make it look old, like you might find in a bog that was seashore in millennia past.
I filed this wee periwinkle down to make it look old, like you might find in a bog that was seashore in millennia past.
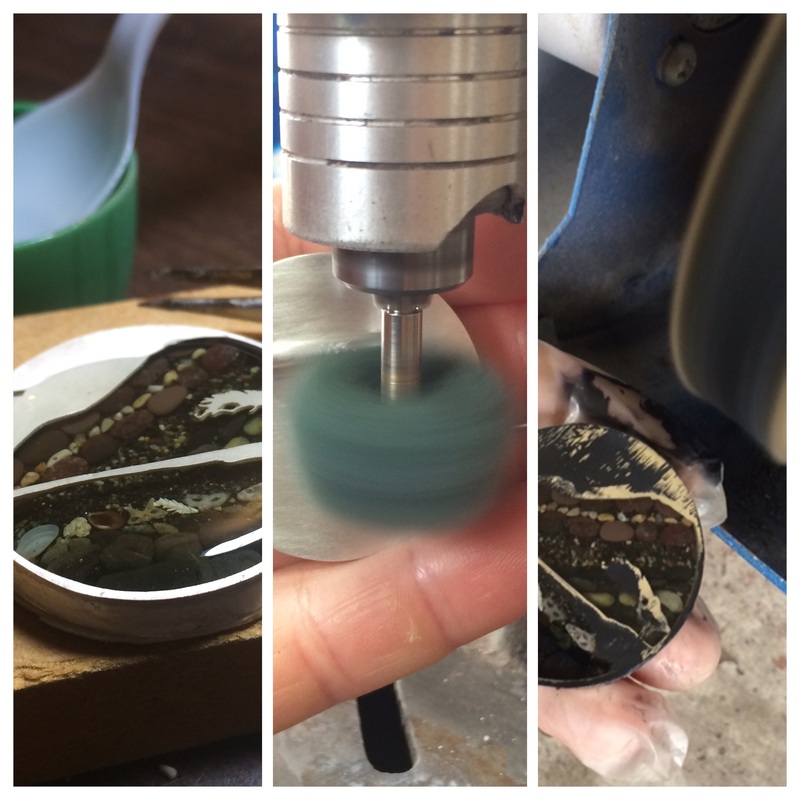
When I'm happy with the arrangement of elements inside the piece, I mix up and pour the resin, supervising it closely to watch for air bubbles (left pic).
When the resin is set, I brush the surface of the silver with a tool I made from scotch-brite pads (middle).
After I've sanded off the excess resin from the top, that surface is polished on my big polishing mop on the bench motor.
When the resin is set, I brush the surface of the silver with a tool I made from scotch-brite pads (middle).
After I've sanded off the excess resin from the top, that surface is polished on my big polishing mop on the bench motor.
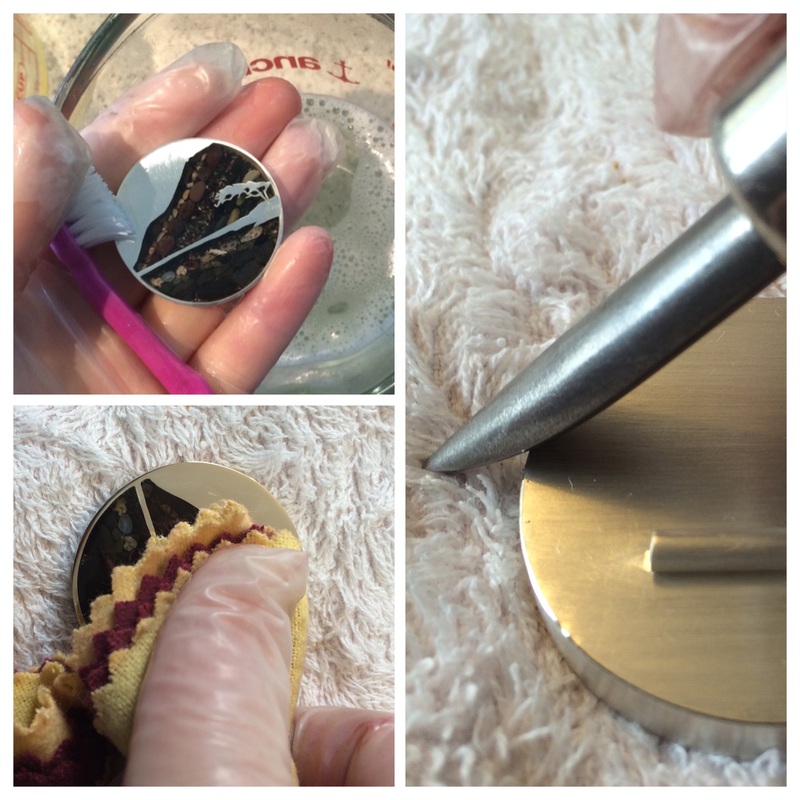
I use a toothbrush, hot water and dishwashing detergent to clean off the greasy polish, then carefully do a final buff-up by hand. The edges of the metal are burnished to set off a glint that catches your eye against the brushed surface of the rest of the piece. Gloves at this stage as we can't have fingerprints!
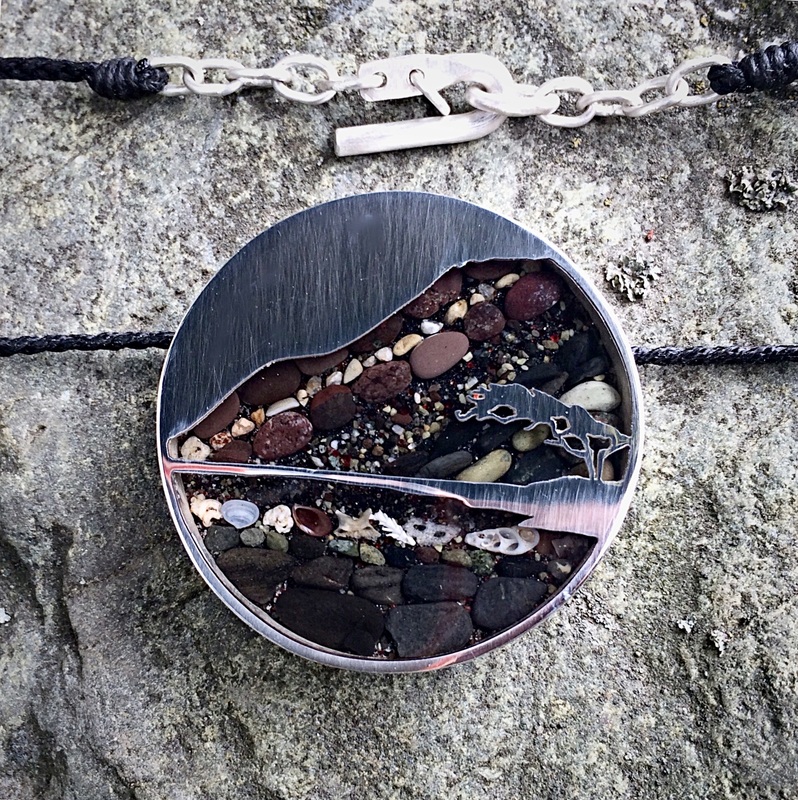
Made the gate latch catch (whole other story there) plaited and lashed the cord and we're done!
Photo isn't the best, unfortunately I didn't check that I had a good picture before rushing it off to its new home. The silver is actually a bright shiny white, rather than the reflected grey here.
The client and her mother love it, happy ending :)
Other commissions I've made here
Get in touch to talk about getting something special made for you or a loved one
 RSS Feed
